Saturday, 14 February 2015

Valentine shortbreads (gluten free, lactose free)

If truth be told my fiancé and I do not like the commercialism of valentines day, I can think of nothing more awkward than being in a restaurant on valentines evening. I would not say I am anti valentines, I believe in showing someone you love them, I just don't think I need a set time and day to do that, and nor do I need people cashing in on our love. Still I know many people love it, each to their own, and if it makes you happy that's fabulous.

I made these biscuits however for two reasons. One I won a bake off at work and one of my prizes was this cute letter stamp set from Lakeland. With valentines a few days away I decided shortbread lovehearts could be quite cute. Secondly the letter for this months alpha bakes is V. So that was sorted, a Valentines bake.


Oh there is a third reason to make these, they are yummy. Vanilla shortbread sandwiched with lemon or chocolate buttercream. As you know if you handle regular shortbread to much it becomes tough, this is the caused by the gluten in the flour, The best thing about using gluten free flour is that the gluten is not there, which means that you can re-roll the scraps of this dough until they are all used up and no tough biscuits occur. Actually they are fantastically short, I think they are better than shortbread I made with wheat flour, hurrah! I have used lactose free butter for that buttery taste, If anyone uses a completely dairy free spread to make shortbread I would love to know how they turn out.

You could make these biscuits in any shape you like, not just hearts, and you do not have to stamp them if you do not have stamps, they will still taste delicious.


Vanilla shortbread 

200g lactose free spread
100g caster sugar
tsp vanilla extract/paste
275g GF plain flour
1/2 tsp xantham gum

For the buttercream

50g lactose free spread
150g icing sugar
splash of diary free milk if needed
Tablespoon of cocoa powder
zest of a lemon


Beat the spread, sugar and vanilla paste together until combined and creamy, then fold in the the flour ans xantham gum. It will initially look like you have way too much flour but be patient all will be fine. Wrap the dough in clingfilm and refrigerate for 30 minutes.

Line the baking sheets with baking parchment. Roll out the dough between two sheets of clingfilm until 5mm thick, stamp out shapes of your choosing and transfer them to the parchment lined baking sheet. Transfer the baking trays to the fridge for 15 minutes. While the cut out biscuits are chilling preheat the oven to 180C/160C FAN/ gas mark 4.

Bake the biscuits for 20 minutes until lightly golden. Leave to cool briefly on the baking sheet before transferring to a wire rack to cool completely.


To make the buttercream beat the sugar and spread together until light and creamy, if it need a little help to come together add the tiniest splash of dairy free milk. I then split the buttercream in half. To one half I added the lemon zest and to the other I added the cocoa powder which I had made into a paste with a tablespoon of boiling water.

Once the biscuits are cool sandwich together with the buttercream. I only sandwich a few together at a time. I keep the unsandwiched biscuits in the tin and the buttercream covered in the fridge. I then sandwich biscuits as and when I need them. This way the biscuits stay beautifully crisp.

Monday, 26 January 2015

Lemon Victoria Sponge

January seems to go on forever doesn't it? Its still cold and dark but without the sparkle of Christmas lights in December and pay day seems ages away, for me personally when I get paid on Wednesday it will have been 40 full days since I was last paid. This sunshine like cake is enough to brighten the dark poor days and reminds us that spring IS on the way.

If you do not need to follow a special diet you can use butter, dairy cream, any lemon curd and wheat flour, simply omit the xantham gum. 


I will enter this cake for alpha bakes as the letter this month is L.


Lemon victoria sponge

3 eggs, weighed with shells, room temperature
Same weight of dairy free spread
Same weight of sugar
Same weight of GF plain flour
1 tsp baking powder
1/2 tsp xatham gum
Tsp vanilla paste
zest lemonLemon curd (I made my own, so it was dairy free)
Dairy free cream
Grease and line the base of two 20cm cake tins, if like me you do not have two tins then make the cakes in batches. Preheat the oven to 180C/160C FAN/GAS MARK 4.

Beat the butter and sugar together until light and fluffy then beat in the vanilla, lemon zest and eggs for a further minute. Add the flour, baking powder and xantham gum and beat until just combined. Do not overbeat.

Divide the mixture equally between the tins and bake for. 20-25 mutes until golden and springy.

Leave to cool in the tin for 5 minutes before turning out onto a wire rack to cool completely.

Once cold sandwich the cakes together with whipped dairy free cream of your choice and plenty of lemon curd.


Sunday, 18 January 2015

Sticky toffee pudding cake

I am a recent convert to sticky toffee pudding and now I cannot get enough of it comforting sticky goodness. It was cold and dark outside and the news was somewhat depressing and I decided a comforting cake was needed. So I concocted a plan to put all the comforting loveliness of sticky toffee pudding in a cake.

This cake was a bit of an experiment but it did all it was supposed too and more. It was absolutely delicious warm from the oven with a little yoghurt and drizzle of maple syrup. It also kept very well and was perfect with a morning cuppa.

I reckon with buttercream of your choice and a bit of decoration this could be an excellent celebration cake as an alternative to chocolate.

I love this cake so much that is is a strong contender to be a layer in my wedding cake... if that does not convince you to try it I do not know what will!


Sticky toffee pudding cake

150g pecan
200g stoned dates
200g dairy free or lactose free spread (I used lactofree this time)
140g light brown sugar
1 tsp vanilla extract
4 medium eggs
140g self raising GF flour

Heat oven to 180C/fan 160C/gas 4. Butter and line the base of a 20cm springform cake tin.

Tip 100g of the pecans into a processor and whizz until fine then continue to process until it becomes a paste, like peanut butter. Add the dates and blend until a thick smooth paste forms. If your dates are a bit dry put them into a small pan with enough water to cover, boil for 5 mins until very soft. Drain, discarding the liquid, then whizz in the processor with the ground pecans until smooth. 

Beat the butter, sugar and vanilla together until light and creamy, then tip in the dates and pecans paste, eggs and a pinch of salt and beat briefly until smooth. Fold in the flour with a metal spoon, then spoon into the tin and level the top. 


Sprinkle the remaining nuts over the top (don’t press them in), then bake for 1 hour mins or until risen and golden and a skewer comes out clean. You may have to cover the top of the cake with foil to stop the top of the cake and pecans catching and getting too dark.

Leave to cool in the tin for 15 minutes before transferring to a wire rack to cool  completely.


Sunday, 11 January 2015

Baked chicken liver mousse (gluten and lactose or dairy free)

A savoury recipe today but it is baked so fits right in with a baking blog! It is so tasty and is packed full or things that are good for you, especially the liver, try not to be squeamish, once cooked it does not look like liver and did I mention it is exceedingly tasty and nutritious? If you need any more convincing chicken livers, even organic, are very very cheap!

Warm this is very very light and mousse like. When I ate this the next day it was completely cold and much firmer, like a very smooth pate. I think the best way to enjoy this is with oatcakes, or anything else with crunch.

I am going to enter this to this months alpha bakes as the letter is L!


Baked chicken liver mousse

serves 6

100g lactose or dairy free spread
1/2 apple, finely chopped
1/2 small onion, finely chopped
100g liver
2 medium eggs
pinch of salt
tablespoon of brandy

Preheat the oven to 150C/130FAN/GAS MARK 2 and grease and line a small loaf tin (14cm by 7cm) Alternatively use small ramekins, no need to grease and line these.

Gently melt the spread before adding in the chopped apple and onion, gently cook for 5 minutes until softened. Remove from the heat and allow to cool slightly.

Put all the ingredients including the cooled spread, apple and onion mix into a food processor and blend until very smooth. 

Pour into your prepared loaf tin or ramekins, place these into a deep roasting dish and pour boiling water  into the roasting dish until it reaches halfway up the loaf tin or ramekins. 

Transfer the roasting tray to the oven (careful!) and cook for 25 minutes in the ramekins or 35 minutes in the loaf tin. It will be set around the edges with just a very very slight wobble in the centre.

Leave to cool for a least half an hour before eating, this is very important in the case of the loaf tin if you want any chance of getting it out neatly. 


Cover any leftovers and keep in the fridge, it is amazing cold the following day. 

Thursday, 8 January 2015

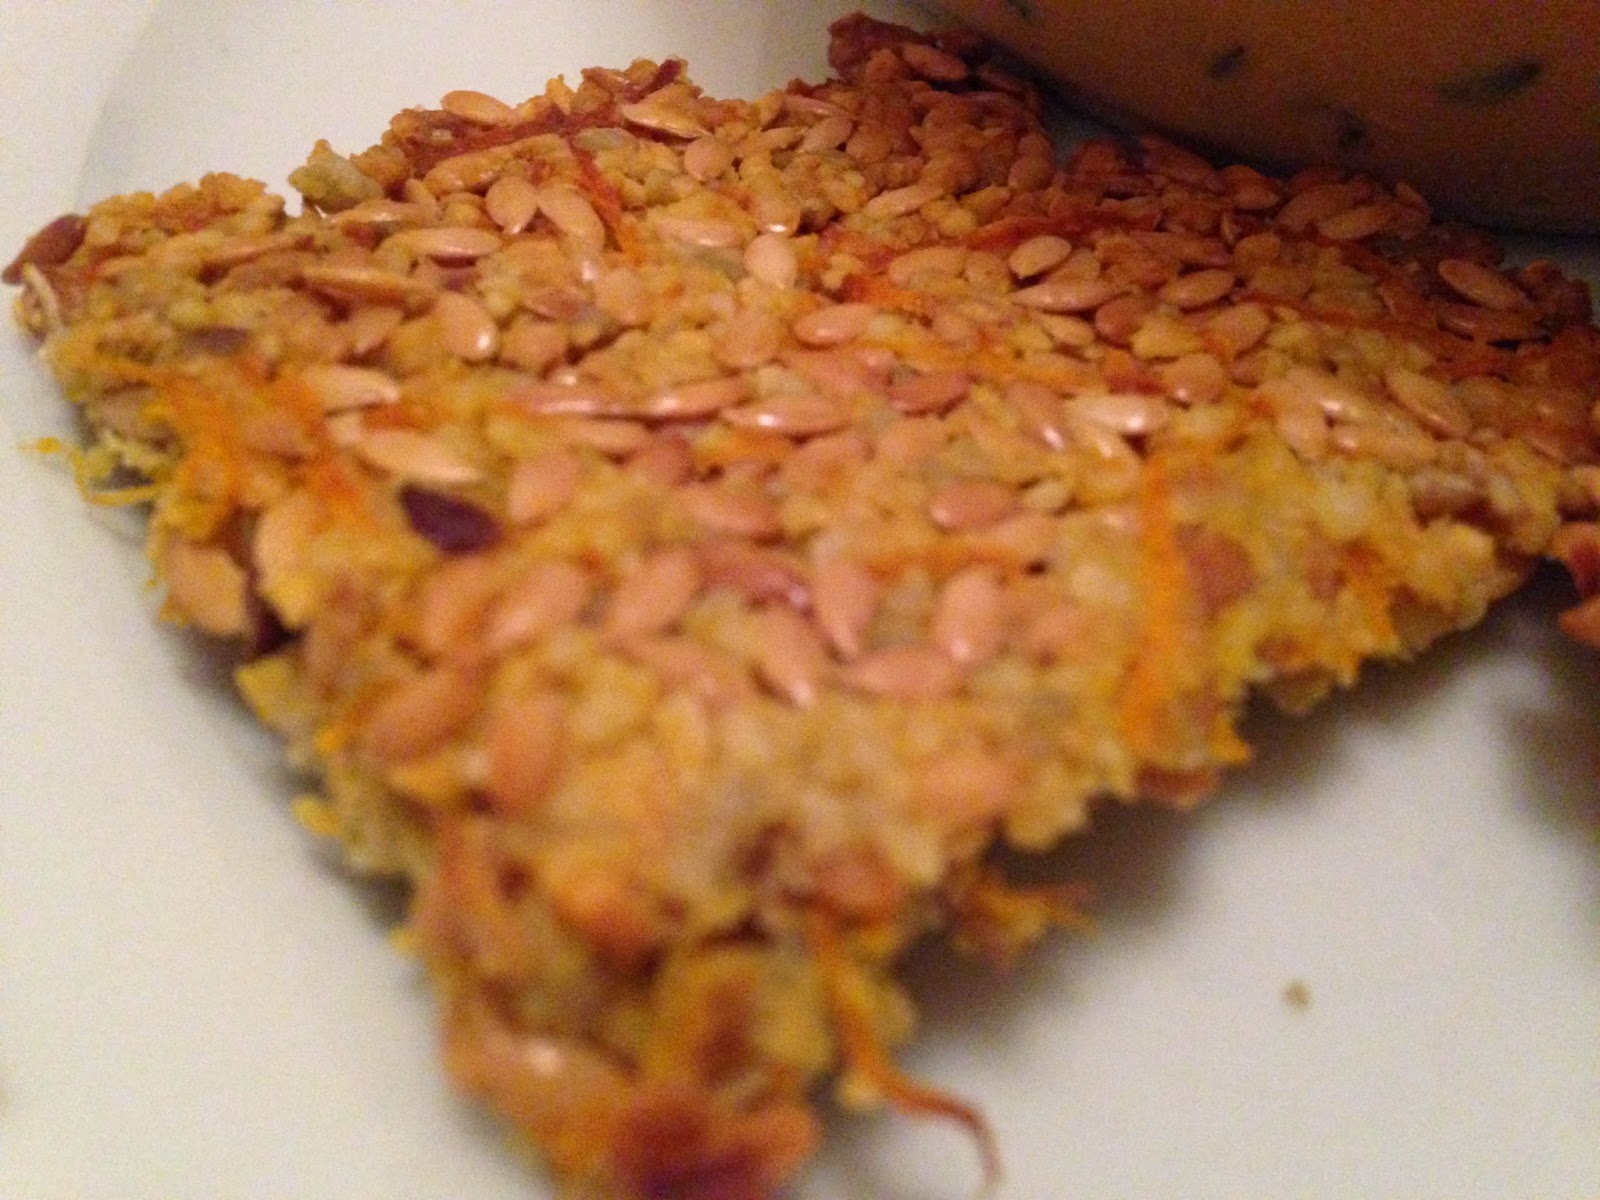
Carrot, almond, sunflower and flaxseed crackers

Happy new year! I hope everyone had a lovely holiday. I really really needed the Christmas break, hence the lack of Christmas themed recipes, though I do have a delicious mincemeat soufflé recipe to share... its too good not to post and I suppose I am not the only one with leftover mincemeat!

This cracker recipe is not a knee jerk reaction to the December excess, I do not believe in detox or deprivation especially in a dark, cold month such as January. This cracker is no rice cake, packed with nuts and seeds it is a delicious and filling snack/lunch to have with hummus, soup etc.

This recipe is adapted from the carrot and flaxseed recipe in the recipe book 'The are of eating well' by Hemsley and Hemsley


Carrot, almond, sunflower and flaxseed crackers

60g blanched almonds
40g sunflower seeds
60g finely grated carrot
80g flaxseeds (linseeds)
1/2 tsp cumin
1/2 tsp salt

Preheat the oven to 200C/180F/GAS MARK 6. Process the almonds and sunflower seeds in a food processor until they resemble a coarse flour.

mix all the ingredients together with your hands to form a dough. Roll out the dough in-between two sheets of baking parchment until very thin ~3mm thick. score the dough into squares, I had some edge pieces which are randomly shaped as my final rolled dough was not a square! Removing the top sheet of baking parchment transfer the dough, still on the bottom piece of parchment onto a baking sheet.

Bake in the oven for 12 minutes. the edge ones will cook a little quicker so cut these off and transfer to a wire rack to cool and return the remaining dough to the oven for a couple more minutes. 

The cracker will be a little soft initially but will firm up as it cools.


Sunday, 21 December 2014

Cheese and sage cornbread muffins (gluten free, lactose free)

A quick recipe today for quick simple tasty savoury muffins. I am not the biggest fan of muffins, I tend to prefer savoury versions though and I love cornbread so gave these a go. I am glad I did too as they a lovely, I had them alongside salad and soups, often refreshing them in the oven and eating them warm perfect. These will keep for a few days in an airtight container, they also freeze well. Sorry for lack of photos, they got eaten!

Cheese and sage cornbread muffins

makes 10 smallish muffins

50g DF spread (I used pure)
150g GF plain flour (I used dove farm)
50g cornmeal
1/2 tsp salt
a pinch of cayenne pepper
2 tsp baking powder
1 tsp xantham gum
tsp dried sage
100g LF mature cheddar (I use arla lactofree)
250ml LF milk or soya milk
2 eggs

Preheat the oven to 180C/160FAN/GAS 4 and line a cupcake/muffin tin with muffin liners.

Into a large bowl add the flour, cornmeal, salt, cayenne, baking powder, xantham gum and sage and mix to combine.

Gently melt the DF spread over a low heat , then mix in the milk and the eggs.

Make a well in the centre of the dry ingredients, add the wet ingredients and mix until just combined. Finally mix in the cheese. 

Divide the muffin mixture evenly between the muffin cases and sprinkle the tops with a little extra grated cheese or some seeds.


Bake in the oven for ~2 minutes until golden and springy. Allow to cool in the tin for 5 minutes before transferring to a wire rack.   


Tuesday, 9 December 2014

Mince pies (gluten and lactose free)

These are my gluten and lactose free mice pies. The pastry is lovely and short and the hazelnuts add a subtle flavour. You can use the mincemeat recipe in my previous post or buy a jar, just check that it meets any dietary requirements it may have. They keep really well in a tin, I liked to warm them for a couple of minutes beofre I tucked in, delicious!


Mince pies (gluten free, lactose free)

makes ~12

75g lactose free spread 
140g plain gluten free flour
1/4 tsp xantham gum
50g ground hazelnuts
1 tbsp golden caster sugar
Jar of mincemear (~400g)

Rub the spread into the flour until it ressembles breadcrumbs. Stir in the xantham gum, hazelnuts and sugar. Using a knife mix in 4 tbsps of cold water until the dough begins to come together. Knead briefly and shape into a disc, wrap in clingfilm and chill for at least 30 minutes before using.

Preheat the oven to 190C/170 FAN/GAS 5 and grease a twelve hole cupcake tin with butter and line with a strip of parchment paper, this will make the pies simple to remove. 


Gently dust a work surface and rolling pin with gluten free flour and roll the pastry until it is 5mm thick. Cut out circles larger in diameter than the base of each hole and use them to gently line each hole. Fill each pie with mincemeat then using the remaining pastry cut out stars to top the mince pies.


Bake for 15-20 minutes in the preheated oven, when golden remove and allow to cool in the tin for 10 minutes before transferring to a wire rack to cool.  
   

Monday, 8 December 2014

Gluten free mincemeat

I can tell its nearly Christmas, and it is not just the cold weather and beautiful fairy lights everywhere. No I mean that busy feeling as you try to get your to do list done before the holidays! I have many blog posts to write and barely have time to sit down for 20 minutes at a time.

Today I share my gluten free mincemeat with you, hopefully tomorrow I will share gluten and lactose fee mince pies with you, I know, I know, promises promises.

I have a mincemeat recipe already on the blog. It is not however gluten free, and I have tweaked the recipe to make it a tiny little less sweet so that the spices shine through, it is now also nut free. Feel free to have a look at both and chose the one that best suits your requirements. If you do not wish to add the brandy just add an extra 50ml of orange juice.

I found gluten free suet in a health food shop but my mum found some in Morrisons so its worth having a look in your local supermarket.

Mincemeat 

1 bramley apple
150g raisins
150g sultanas
80g stoned dates, chopped
100g  GF vegetarian suet
200g brown sugar
1 tsp mixed spice
1 tsp cinnamon
fresh grating of nutmeg
Zest and juice of a small lemon
Zest and juice of half an orange
50ml brandy (or extra orange juice)

Put the raisins, sultanas, dates, suet, sugar and spices into a bowl and mix. Peel and grate the apple then add this to the bowl along with the citrus juice, zest and brandy, Give the whole thing a good mix.

Leave overnight, giving a good stir every now and then. By morning it will be slightly darker and lovely and sticky.

 Pack into sterile jars and leave to mature for as long as possible, saying that if you use it almost immediately it will still be delicious. 


Saturday, 22 November 2014

Cherry and almond loaf (gluten free, dairy free)

This is a good loaf cake for using up any leftover glacé cherries you may have lurking after your Christmas cake/pudding/mincemeat baking. Of course it you have no leftover cherries go by some because this is an amazing cake!

You may notice that the weights are in ounces, except the ground almonds which are in grams, this is because I stole the recipe from my mum.

I took this cake into work to celebrate the fact I passed my viva... 4 years of work but I am now a Dr. Finally I can have a break from reading about science and get baking and blogging.

As always if you do not have an issue with butter or gluten feel free to substitute the DF and GF components with their regular counterparts.


Cherry and almond loaf

6oz dairy free spread (I use pure)
6oz golden caster sugar
3 eggs
tsp almond extract
6oz GF plain flour (I use dove farm)
1/2 tsp xantham gum
4tsp GF baking powder
100g glacĂ© cherries, chopped into 1/2 or 1/4 depending on their size
75g ground almonds

First preheat the oven to gas mark 4/180C and grease and line a 2lb loaf tin. Beat the DF spread and sugar until creamy then beat in the eggs one at a time,  followed by the almond extract. Beat in the flour, xantham gum and baking powder until it is just combined. Rinse the cherries and dry on kitchen paper, this prevents them from sinking to the bottom of your cake. Toss the cherries in the ground almonds, this also helps them stop sinking. then fold the cherries and almond into your cake mix until the cherries are evenly distributed.

Transfer the cake mix to your prepared tin and smooth with a spatula. Bake in the preheated oven for 40-50 minutes (mine took just over 40) until golden and a skewer comes out clean. Allow the cake to cool in the tin for 10 minutes before transferring to a wire rack to cool completely. 


I took a little mix out of the big loaf tin to make a baby cake for the two of us to eat as a tester before I took the big one to work! Sorry for the dark photo, it was evening. I really need to work on my camera skills, if anyone has any tips do let me know!

Sunday, 2 November 2014

Ginger, lemon and honey biscuits (gluten free, dairy free)

I promised you a post for apple butter victoria sponge, and was all set to do so until I woke up with a cold. I can't complain too much, it is the 2nd November and my first cold this year so I have done pretty well. My head is fuzzy and I know I will miss something out of the relatively simple but multi stage apple butter blog post. Soon I promise you, soon. 

Instead I offer you a simple recipe for ginger, honey and lemon biscuits. I like to think of these as the perfect healing biscuits if you have a cold. After all honey, lemon and ginger all feature heavily in commerical cold remidies.  And if you don't have a cold? They are still delicious little biscuits to nibble whenever you wish. 

The recipe is based on one for ginger and lemon biscuits by Signe Johansen in Scandilicous baking. As they contain honey I am going to enter them into this months alpha bakes.

Ginger lemon and honey biscuits

50g stem ginger
1 medium egg
20g golden syrup
20g honey
10g stem ginger syrup (from the jar the stem ginger comes in)
zest and juice of 1 lemon
125g non dairy spread (I used pure soya)
125g golden caster sugar
200g GF plain four
1/2 tsp xantham gum
1 tsp baking powder
1/4 tsp bicarbonate of soda

Finely chop the stem ginger, add to a jug and mix in the egg, golden syrup, honey, stem ginger syrup and the zest and juice the lemon. 

In a separate bowl cream the DF spread and sugar together until creamy. Add in half the wet ingredients, 1/2 the flour and the xantham gum, baking powder and bicarbonate of soda then mix to combine. Add the remaining wet ingredients and mix, finally add the remaining dry ingredients and mix until everything is combined. Place clingfilm over the bowl and refrigerate for 1-2 hours.

Preheat the oven to gas mark 5 and line a baking sheet with baking parchment. Place teaspoons full of the dough onto the sheet, making sure to leave 4-5cm between them. 


Bake in the preheated oven for 8-10 minutes, until golden round the edges. Transfer to a wire rack to cool. 


I really like these biscuits, they are light, not heavy and crunchy like regular ginger biscuits (which I also love) and the lemon adds a freshness to the ginger. They will keep in an airtight tin for at least a week. If they start to go soft blast them in the oven for a couple of minutes to crisp them up.  


Saturday, 1 November 2014

Final bake off and a catch up

Hi, I know my blog is just a hobby and nothing bad is going to happen should I miss a few posts but I still feel really bad having abandoned my little blog for long.

To cut a long story short I have been ill and was in hospital and so I did not particularly want to eat let alone bake.

When I did bake I was baking items that I have made previously and are already on the blog! I did my final bake along with bake off. I recreated their final technical challenge, making mini victoria sponges, mini scones, and mini brownies. You may remember that the contestants made lemon tarts not brownies but I was pressed for time and not about to make a gluten and dairy free pastry topped with a dairy free custard! They all went down very well, in particular I thought the gluten free scones were delicious.


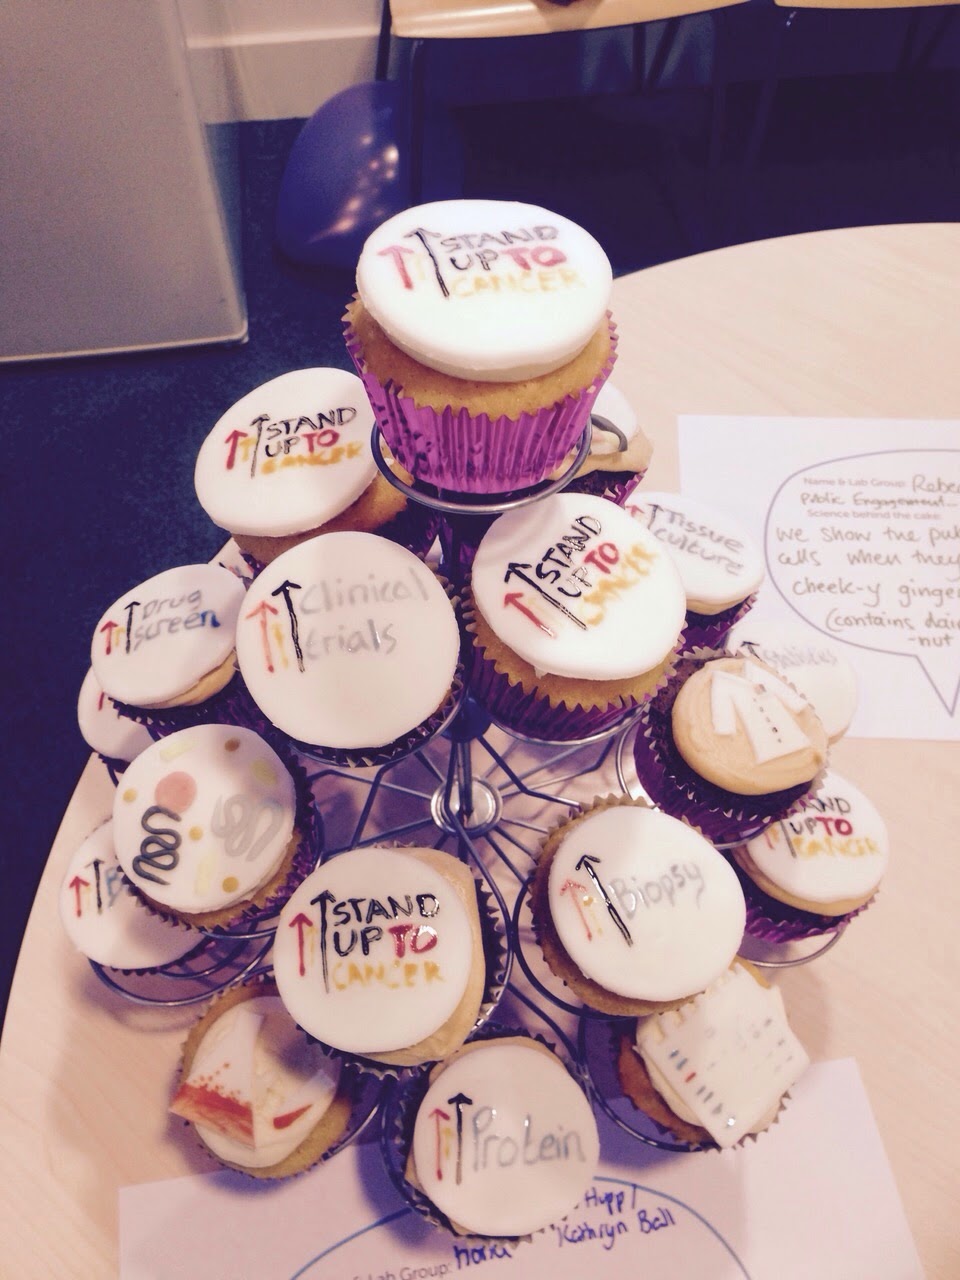
I also entered the science bake off at work (I work in a lab), there was a prize for best decorated science cake and a prize for the yummiest cake. I made cupcakes, chocolate and salted caramel and white chocolate and raspberry. They were gluten free, the chocolate and salted caramel were lactose free and the others were low lactose with 2g of white chocolate per cupcake. My allergy friendly cupcakes won yummiest cake! I was absolutely delighted.

My first bake post hospital was a simple comforting banana bread. Sometimes a simple old classic is what everyone needs.

I am ready to start baking again, I have a fantastic apple butter victoria sponge to share with you tomorrow. If you are wondering what a fruit butter is come back tomorrow and all will be revealed.

Saturday, 11 October 2014

Schichttorte

What will we do on Wednesday nights now that bake off is over? The final was thrilling and I am so pleased that my favourite won, my favourite never wins... I jinx them from the start simply by liking them!

The wee before the final was patisserie week and the bakers had to create two types of baklava, two types of entremets and a schichttorte. The first two I had heard of, the last I not not. Looking it up I was instantly intrigued, a grilled cake? Would it taste different to a baked cake? There was only one way to find out.

I used the recipe from Paul Hollywood found here. I made tweaks to make it gluten and dairy free, and also had to turn my grill down and cook for 30 seconds less than stated. 


Admittedly it does have the wow factor when you cut into it, all those layers. When I first tried a slice I did not know what to expect and so was not overwhelmed with the texture of the cake, I think I prefer my cakes baked not grilled. Having said that over the next few days the cake grew on me and I have decided I do quite like it after all. Whether I like it enough to spend two hours making one again remains to be seen. Oh and the chocolate glaze is immense. 

In final week I absolutely loved how the bakers went back to basics for the technical challenge. I firmly believe a good knowledge of the basics is what makes a consistently good baker and Nancy helped prove me right by nailing it. 

For my final bake along with bake off bake I am going to make scones, mini victoria sandwiches and some form of mini patisserie and aim to make them all perfect. I will do this next weekend when my parents come see my new flat for the fist time,after walking the hills of Edinburgh I am sure everyone will be ready for a cup of tea and a cake or two!


Saturday, 4 October 2014

Chocolate and pecan traybake (gluten and dairy free)

This is a simple to make and deliciously chocolatey traybake, that's probably thanks to the 200g of dark chocolate in here! We enjoyed this so much that we finished it within days of it being made, saying that it does keep well. If you can eat dairy and gluten feel free to use butter and regular plain wheat flour.

 Definitely one to add to the collection, I can see this being made again with different flavouring and nuts for variety,

Chocolate and pecan traybake

200g dark chocolate
100g DF spread (I used pure)
85g golden caster sugar
4 eggs, separated, the whites into a greasefree bowl
85g ground almonds
75g GF plain flour (I used Dove farm)
1/8 tsp xantham gum
Pecans for decoration, anything from 50-100g

Preheat the oven to 160C/180C FAN/gas 4 and line a 25cm square cake tin or brownie/traybake tin with baking parchment. 

Put the chocolate and butter in a heatproof bowl and place over a pan of barely simmering water and heat gently, stirring every now and then until the chocolate and butter has melted. When cool, but still melted, stir in half the sugar and the egg yolks.

Whisk the whites to firm peaks, add the remaining sugar, then whisk again until glossy. Stir a spoonful of the egg whites into the chocolate mix along with the ground almonds, flour and xantham gum then fold through the rest. Transfer to the tin and top with lightly broken pecans. 

Bake for 25 minutes, cool in the tin for 10 mins, then lift onto a wire rack to cool completely. 

Thursday, 2 October 2014

Gluten free nutella bread

Thus is me catching up with my bake off posts. This is from last week where the contestants had to make an enriched loaf. I tweaked this challenge slightly as their loafs involved fruit and I did not want fruit, I wanted chocolate.


The recipe for the braided nutella bread comes from the delightful Gluten-Free on a Shoestring blog and the recipe can be found here.

I did have to make my own nutella as shop bought contains dairy and I will share this recipe below.

The finished load does look beautiful and is the nicest gluten free bread that I have made so far. It was perfect warm from the oven with a little extra nutella and a pot of tea for a special weekend breakfast.


Homemade nutella (Dairy and Gluten free)

100g hazelnuts (skinned)
2 tbsp good cocoa powder (I used green and blacks)
4-5 tbsp of hazelnut milk (Or use almond or soy milk if you cannot get hold of hazelnut)
1 1/2 tbs brown sugar or maple syrup
1/2 tsp vanilla paste

Blitz the hazelnuts in a food processor until they from a smooth-ish paste. Add all the other ingredients and continue to blitz until combined and as smooth as possible. Transfer to a sterile jar and keep in the fridge, eat within a couple of weeks. 

This nutella is a more grown up version, it is a little more intense, darker and not as sweet. I really like this however should you wish to make it sweeter simply add more sugar/maple syrup until it as sweet as you desire. This nutella is quite thick, add a splash more milk if you desire.

As well as the bread this nutella is great on toast topped with a sliced banana! 

Friday, 26 September 2014

Gluten and Dairy Free Choux pastry.

Watching bake off this week I realised that I had completely forgotten to post my creation from pastry week, oops. To be honest I was dreading pastry week as attempting to make gluten and dairy free pastry is a tricky business. I decided that choux was my way forward and attempted some of my own eclairs. I have had previous successes making regular choux so I was hopefully optimistic that I could make this work.

And it turns out you can make gluten and dairy free choux. It is not quite as smooth and glossy as regular choux and whereas I would normally use a wooden spoon I did have to use a hand held electric whisk to get the choux dough as smooth as possible.
See, not totally smooth and glossy
Once baked however my mini eclairs looked and tasted like the regular deal. I tarted up my eclair by making them banoffee eclairs. I filled them with sliced banana, vanilla whipped non dairy cream and topped with non-dairy toffee sauce. They were declared delicious by all. Below is the recipe to make gluten and dairy free choux, feel free to jazz up you eclair with any topping or filling that you desire.


Choux pastry (gluten and dairy free) 

60g gluten free flour (I used dove farm)
2 tsp caster sugar (optional)
150ml cold water
50g dairy free spread (I used pure, sunflower)
2 large eggs

Weigh the flour then fold a sheet of baking paper to make a crease and then open it up again. Sift the flour on to the paper and add the caster sugar if you are making sweet choux.

Next put the cold water in a saucepan together with the butter, then place the saucepan over a medium heat and stir with a wooden spoon. As soon as the butter has melted and the mixture comes up to the boil, turn off the heat immediately, as too much boiling will evaporate some of the water.

Next tip the flour in, all in one go, with one hand, while you beat the mixture vigorously with the other (using the electric whisk).

Beat until you have a smooth ball of paste that has left the sides of the saucepan clean, this will probably take less than a minute

Next beat 2 large eggs then beat them into the mixture, a little at a time, mixing each addition in thoroughly before adding the next. Beat until you have a smooth(ish) glossy(ish) paste. At this stage, lightly grease a baking sheet and place a ovenproof dish with a little water in the base of the oven to create a steamy atmosphere.

To make the éclairs place the mixture in to a piping bag fitted with a wide round tip and pipe mixture onto the baking sheet, leaving 1 inch between them. Bake in the pre-heated oven for 10 minutes. After that, increase the heat to gas mark 7 220C/200CFAN and bake for a further 10-15 minutes until the buns are crisp, light and a rich golden colour.

Split the éclairs and return to the oven for a couple of minutes to dry out the insides.


Transfer to a wire rack to cool and fill just before eating to enjoy them at their best. 

Sunday, 21 September 2014

Blueberry crumble cake

Last week it truly felt like autumn was here, it was colder, dark when I got up, dingy and grey. The only way to combat this was a comforting cake made with cinnamon and fruit, I did not quite veer into the autumn fruit territory (apples, blackberries, pears) but used some Scottish blueberries. a last hopeful cling on to summer. It worked we got a mild reprise to summer this weekend with plenty of sunshine and blue skies!

The cake is from this months good food magazine, I adapted it a little to make it gluten and dairy free and also enough to fit into a brownie tin.

The crumble topping is fantastically crisp and contrasts perfectly with the soft cake and fruit. This cake is best eaten as soon as possible as it contains fresh fruit. Also the sooner it is eaten the crisper the topping will be.

Oh and sorry for the dark photos... that is partly down to me wanting to eat it and partly down to the rubbish autumn weather I mention previously!


Blueberry crumble cake (adapted from bbc good food magazine)

150g dairy free spread (I use pure, sunflower)
225g golden caster sugar
300g GF plain flour (I use Dove farm blend)
1 tsp xantham gum
1 1/2 tsp GF baking powder
1/2 tsp bicarbonate of soda
3 medium eggs, room temperature
1 tsp vanilla paste/extract
180g natural soya yoghurt
1 1/2 tbsp non dairy milk (I used almond milk)

1 tbsp and 1 tsp of ccinnamon
2 tbsp each of golden caster sugar and brown sugar (light or dark). mixed
200g blueberries
6 tbsps GF plain flour
3 tbsps dairy free spread, cut small

Preheat the oven to 180C/160C FAN. GAS MARK 4 and grease and line a brownie tin (or traybake tin) with baking paper.

Beat the DF spread and sugar with an electric whisk until fluffy. Add the flour, xantham gum, baking powder and bicarbonate of soda to the bowl followed by the eggs and vanilla, beat until smooth. Add the yoghurt and DF milk and briefly beat until combined.

Spoon just under half of the mix into the prepared tin. Mix 1 tablespoon of the cinnamon and 2 tablespoons of the sugar mix and scatter half of this over the cake followed by half of the berries. Layer over the remaining cake mix, take care when smoothing it out the berries will want to come with you. Sprinkle over the remaining sugar/cinnamon mix followed by the remaining berries.

To make the crumb topping place the remaining sugar mix, flour and DF spread into a bowl and rub together until the mixture resembles chunky breadcrumbs. Sprinkle the crumble topping over the cake, squeeze some of the crumble together to make bigger chunks as you do. 

Bake the cake for 35-40 minutes, until it is risen all the way till the centre. looks golden and the topping is crisp.

 Cool the cake in the tin for 15 minutes then transfer to a wire rack, using the baking paper to help you lift the cake, to cool completely.


Friday, 12 September 2014

Kugelhopf

So continuing along with the bake off you may have noticed I do not have a post for tarts and pies week. Well I did attempt to make a pie, I was terrified, a gluten and dairy free pastry was not an experiment I was looking forward to. The pastry I made was lovely and delicious, but it was meant to be puff pastry, something I never had problems with in the past,  and it turned out like shortcrust. I will reiterate it was lovely but I am not posting the recipe I used as it did not turn out as it should. I get to do pastry again soon though as next week is pastry week on the bake off! I show a picture of my pie to prove that I tried.


This week was the week of European cakes. The contestants had to make a European cake that was raised with yeast, a Swedish princess cake or a Hungarian dobes torte. I have never made a princess cake but I have eaten cakes consisting of sponge, jam, cream and creme pat and so I decided to go with the more interesting cake raised with yeast as I have never made/eaten one before.

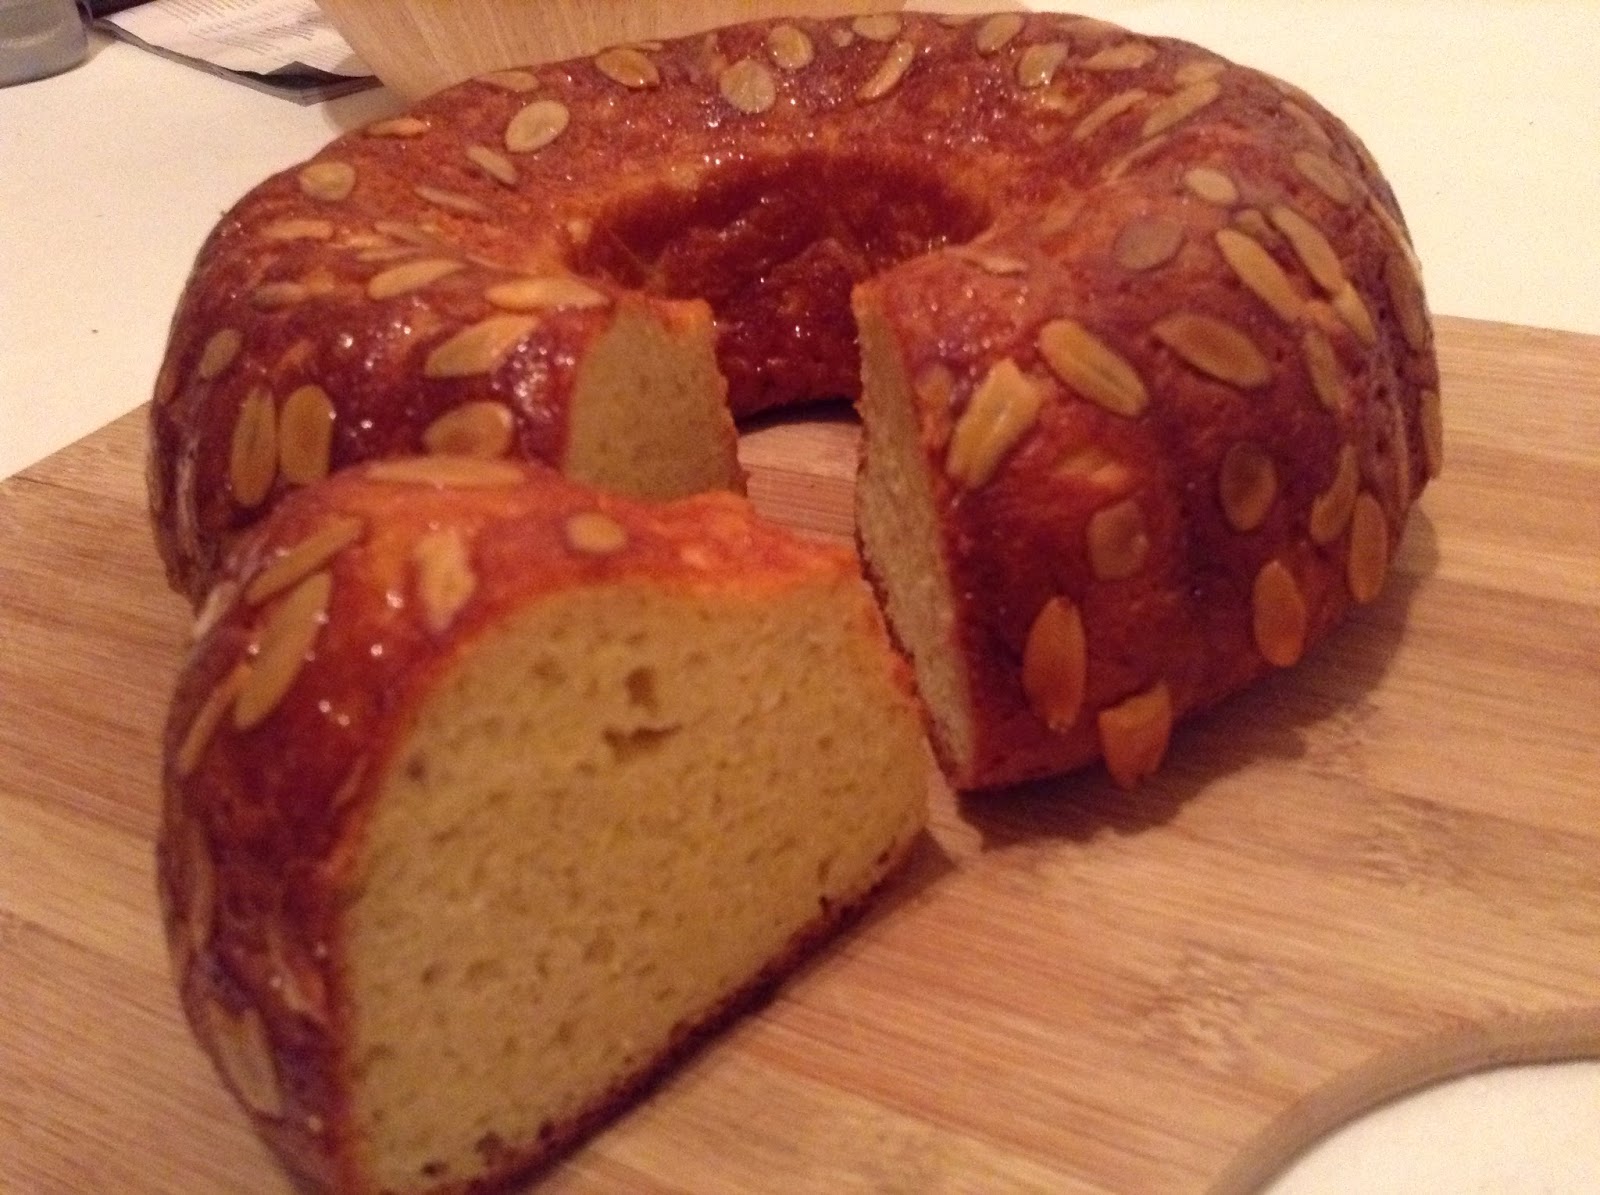
I decided, like some of the contestants, to make a Kugelhopf. This is traditionally a cake raised with yeast, filled with fruit and cooked in a bundt tin. Like many of the contestants I changed my flavours, I went for cardamom, orange and almond. I also had the added challenge of making it gluten and dairy free.

I have also just remembered that this months letter for alpha bakes is K and so I will enter my Kugelhopf!


This is an experiment that worked and I am so so pleased with it, it smelt good baking, looked fantastic and also tasted great. It is very interesting, it is definitely a cross between bread and cake and those with palettes used to very sweet cakes will probably take a while to adjust. It is lovely as a plainer cake and dare I say it could even be eaten as breakfast (which I did). It does not keep so long so I have sliced it and individually wrapped slices and frozen them, I will refresh in the oven when I fancy a snack or breakfast.

Orange, cardamom and almond Kugelhopf 

380g GF flour (I used dove farm plain flour blend)
60g ground almonds
2 tsps xantham gum
Seeds of 15 cardamom pods, crushed in a pestle and mortar
120ml warm water
4 1/2 tsp active dried yeast (not instant yeast)
1/2 tsp sugar
120g DF spread (I used pure sunflower)
75g golden caster sugar
2 tsp salt
3 eggs
2 tsp almond extract
Zest and juice of an orange
2 tbsp caster sugar
a little melted butter to grease
slivered almonds to decorate (optional


Place the warm water, yeast, and ¼ teaspoon sugar together in a small bowl. Stir until yeast is dissolved. Set aside for 10-15 minutes until the yeast is foamy

Place 220g of the gluten-free flour in a freestanding large bowl or the large bowl of a large stand mixer. Add the xanthan gum and cardamom and mix to combine

In a small saucepan, heat the milk, butter, sugar, and salt. Stir until sugar is dissolved, do not let it boil.

In a medium bowl whisk  the eggs together with the almond extract and orange zest. Carefully add the milk mixture in a slow, steady stream to the eggs and whisk well. Be sure to add the milk slowly so it doesn't curdle the eggs. 

Turn the mixer on low, or using a hand held electric whisk add the milk and egg mixture in a slow steady stream to the flour mix. Raise the speed to medium and mix until smooth. Lower the speed and add the remaining flour and ground almonds. The dough should be fairly sticky and smooth, but not too stiff. Turn off mixer and let dough stand for a few minutes.

Grease a bundt pan with melted butter. if desired stick slivered almonds onto the sides of the greased pan.

 Carefully transfer the dough to the pan and smooth it evenly. Brush the top with the melted butter to prevent it drying out. 

Cover with cellophane or place in a bag and let rise for 45-60 minutes in a warm place. The dough won't have doubled, but it will have risen quite a bit.

While the dough is rising preheat the oven to GAS MARK 6 . Bake for 40-45 minutes, or until golden and baked through.

Let cool in the pan for a few minutes, then transfer to a wire rack to finish cooling.

To make a glaze put the remaining sugar and orange juice in a pan and heat gently until the sugar had dissolved, turn up the heat and reduce until the mixture is syrupy. Brush this over the cooled cake then enjoy.