A savoury recipe today but it is baked so fits right in with a baking blog! It is so tasty and is packed full or things that are good for you, especially the liver, try not to be squeamish, once cooked it does not look like liver and did I mention it is exceedingly tasty and nutritious? If you need any more convincing chicken livers, even organic, are very very cheap!
Warm this is very very light and mousse like. When I ate this the next day it was completely cold and much firmer, like a very smooth pate. I think the best way to enjoy this is with oatcakes, or anything else with crunch.
I am going to enter this to this months alpha bakes as the letter is L!
Baked chicken liver mousse
serves 6
100g lactose or dairy free spread
1/2 apple, finely chopped
1/2 small onion, finely chopped
100g liver
2 medium eggs
pinch of salt
tablespoon of brandy
Preheat the oven to 150C/130FAN/GAS MARK 2 and grease and line a small loaf tin (14cm by 7cm) Alternatively use small ramekins, no need to grease and line these.
Gently melt the spread before adding in the chopped apple and onion, gently cook for 5 minutes until softened. Remove from the heat and allow to cool slightly.
Put all the ingredients including the cooled spread, apple and onion mix into a food processor and blend until very smooth.
Pour into your prepared loaf tin or ramekins, place these into a deep roasting dish and pour boiling water into the roasting dish until it reaches halfway up the loaf tin or ramekins.
Transfer the roasting tray to the oven (careful!) and cook for 25 minutes in the ramekins or 35 minutes in the loaf tin. It will be set around the edges with just a very very slight wobble in the centre.
Leave to cool for a least half an hour before eating, this is very important in the case of the loaf tin if you want any chance of getting it out neatly.
Cover any leftovers and keep in the fridge, it is amazing cold the following day.
Showing posts with label Alpha bakes. Show all posts
Sunday, 11 January 2015
Monday, 12 May 2014
Earl grey and lemon scones
Picture the scene, perfectly brewed earl grey, a slice of lemon and a freshly baked scone. Hmmmm, a perfect match. So perfect in fact, how about if we merged them? This idea came about as 1) I wanted fresh scones for breakfast and 2) the letter for this months alpha bake is 'E'.
I decided to soak raisins overnight in earl grey tea, before incorporating them into my scone along with plenty of lemon zest.
Earl grey and lemon scones
Earl grey tea bag
60g raisins
120ml almond or soya milk
1/2 tsp apple cider vinegar
185g plain flour
120g oats
50g golden caster sugar
2 tsp baking powder
3/4 tsp bicarbonate of soda
Pinch of salt
110g dairy free spread (I use pure)
Zest of a lemon
1/2 tsp vanilla paste/ extract
The night before you make the scones, make a strongish small cup of earl grey tea, and soak the raisins in it overnight. Come morning they will be plump and infused with earl grey.
Preheat the oven to 180C/160C FAN and dust a baking sheet with flour. Mix the milk and vinegar together and set aside to curdle.
Mix the flour, oats, sugar, baking powder, bicarbonate of soda and salt. Rub the dairy free spread in with your fingertips until the mix resembles breadcrumbs. Stir through the zest of a lemon.
Add the vanilla to the milk and stir the milk mix into the dry ingredients until just combined, do not overmix. Dollop 8 equal blobs onto the baking sheet and bake in the oven for 20-25 minutes until golden.
Transfer to a wire rack to cool a little before enjoying warm with butter, lemon curd, marmalade or jam.
Enjoy any leftovers the next day refreshed in a warm oven for five minutes.
The lemon and earl grey complement each other beautifully, the earl grey adds a fragrance and takes away a little of the sweetness of the raisins. For an experiment I was very pleased and would definitely make them again.
Labels:
Alpha bakes,
dairy-free,
earl grey,
lemon,
raisin,
Scone,
vegan
Tuesday, 17 December 2013
Xmas village
First things first. I can spell. As a general rule I very much dislike the word xmas instead of Christmas. Having said that, this months letter for alpha bakes is 'X'. I cannot find a food that begins with X so am actually pretty relieved it has turned up in December.
I was having my weekly wander round lakeland when I spotted, amongst much Christmas bakeware, their mould for a fairytale village. I have always wanted to make a gingerbread house and thought that for my first one small would be better as they would be sturdy. The mould can be used for chocolate or gingerbread.
I followed the recipe on the packet as I thought that it may be important for the structural integrity of the houses. I did add an extra half teaspoon of ginger and 1/2 a teaspoon of mixed spice as I really like my gingerbread to have a deep warmth. I also used all treacle. You could use all golden syrup or or a mix but 1) I like the flavour of treacle and 2) It makes my houses nice and dark which contrast nicely with the snow.
I have never made royal icing before but it was very easy and holds my house together very very well indeed.
I got creative with all the remaining royal icing to create snow drifts by doors and in window panes. I also had a go at icicles and am very pleased for my first attempt. I finished the whole thing off with a dusting of icing sugar.
Saturday, 16 November 2013
Whole orange cake
This cake came about because I asked for one orange for a salad dressing. I got two because according to Mark they looked so pretty. So a spare orange was staring at me from the fruit bow. I remembered reading this recipe in a recipe book a colleague had and so decided to utilise the orange to make a cake. You essential boil the orange for an hour then purée it and add it to a simple cake batter.
The results are a lovely moist orange favoured cake. The recipe suggests drizzling with an icing made from orange juice and icing sugar but I did not do this. The cake is orangey enough without it, and besides, I would have needed another orange, and that's how I got into this in the first place!
Whole orange cake
1 small orange
140g caster sugar
3 eggs
85g self raising flour
100g ground almonds
50g butter melted
Put the orange in a pan, cover with cold water and bring to the boil. Cover, reduce the heat and simmer for 1 hour. Remove the orange and allow to cool. To cool quickly run under cold water for a few minutes.
Preheat the oven to 180C/160C FAN. Grease a deep 20cm round springform tin and line the base.
Roughly chop the cooled orange, discarding any pips, and whizz in a food processor until smooth.
Beat the sugar and eggs until light and fluffy. Gently fold in the flour and the almonds then fold in the orange purée. and melted butter until just mixed. Pour into the prepared cake tin and bake for 45 minutes until the cake is golden and springy. Cool in the tin for 5 minutes before transferring to a wire rack.
This is a simple cake perfect at any time, especially when you want cake but nothing too sweet or rich. It stays moist thanks to the almonds and is nice cold or warmed through in the oven.
I am going to enter this cake into this months alpha bakes, the letter for this month is 'O', so orange fits the bill perfectly.
The results are a lovely moist orange favoured cake. The recipe suggests drizzling with an icing made from orange juice and icing sugar but I did not do this. The cake is orangey enough without it, and besides, I would have needed another orange, and that's how I got into this in the first place!
Whole orange cake
1 small orange
140g caster sugar
3 eggs
85g self raising flour
100g ground almonds
50g butter melted
Put the orange in a pan, cover with cold water and bring to the boil. Cover, reduce the heat and simmer for 1 hour. Remove the orange and allow to cool. To cool quickly run under cold water for a few minutes.
Preheat the oven to 180C/160C FAN. Grease a deep 20cm round springform tin and line the base.
Roughly chop the cooled orange, discarding any pips, and whizz in a food processor until smooth.
Beat the sugar and eggs until light and fluffy. Gently fold in the flour and the almonds then fold in the orange purée. and melted butter until just mixed. Pour into the prepared cake tin and bake for 45 minutes until the cake is golden and springy. Cool in the tin for 5 minutes before transferring to a wire rack.
This is a simple cake perfect at any time, especially when you want cake but nothing too sweet or rich. It stays moist thanks to the almonds and is nice cold or warmed through in the oven.
I am going to enter this cake into this months alpha bakes, the letter for this month is 'O', so orange fits the bill perfectly.
Thursday, 24 October 2013
Chocolate and hazelnut cake
I miss baking! In my last post I mentioned that I had been away with work. When I got back the oven was (temporalily) broken and then I went away on holiday. Holiday was very nice but I do miss the act/smell taste of some baked goods. I am away this weekend too (brownie camp) so I doubt October will be very fruititous in the baking department.
Still I did find time when I was away to make this, quite frankly, delicious cake. It was devoured fast enough by my fiances family and myself.
This cake is a cross between a maryland cookie, ferrero rocher and a cake. If that has not convinced you to give it a try nothing ever will.
A vanilla and hint of coffee sponge, packed with hazelnuts and dark chocolate, topped with a chocolate glaze and more hazelnuts. Yum.
Chocolate and hazelnut cake (recipe adapted slightly from Nigel Slater)
makes one deep cake
250g butter (I used lactose free spread)
100g demerara sugar
100g dark brown sugar
1 tsp vanilla paste
4 eggs
2 tablespoons of coffee, made and set aside to cool slightly
250g plain flour
2 tsp baking powder
pinch salt
200g chopped hazelnuts
250g of dark chocolate, chopped
30g butter
1/2 tablespoon golden syrup
tablespoon of double cream
Preheat the oven to 180C/160C FAN. Grease a 23cm spring-form tin, line the base with baking parchment and flour the sides.
Beat the butter, sugar and vanilla together until light and creamy. Beat in the eggs one at a time, followed by the coffee. Fold in the flour, baking powder and salt until almost combined. Finally fold in the hazelnuts and chocolate, reserving 30g of each, until no streaks of flour are visible and the chunks of nut and chocolate are evenly distributed.
Pour the batter into the prepared tin and level the top, bake for 70-80 minutes until golden and cooked through. Mine took 75 minutes, after 1 hour I covered the top with foil.
Leave the cake to cool in the tin for 10 minutes before transferring to a wire rack to cool completely.
Leave the cake to completely cool.
To make the topping put the butter, golden syrup, cream and reserved chocolate in a pan, heat gently, stirring occasionally until the chocolate has melted and all the ingredients are combined. Remove from the heat and set aside for 15 minutes to thicken up slightly.
Spread over the cooled cake and sprinkle with the reserved hazelnuts.
I should say that I had no electric whisk just a wooden spoon and elbow grease and it turned out lovely.
I would say this is a special enough cake for any occasion, but it matters not if this occasion is simple because it is a Tuesday.
This cake contains chocolate and as 'C' is the letter for this months alpha bakes I am going to enter this cake, I suspect Ros is going to get a lot of entries with chocolate in this month...
Still I did find time when I was away to make this, quite frankly, delicious cake. It was devoured fast enough by my fiances family and myself.
This cake is a cross between a maryland cookie, ferrero rocher and a cake. If that has not convinced you to give it a try nothing ever will.
A vanilla and hint of coffee sponge, packed with hazelnuts and dark chocolate, topped with a chocolate glaze and more hazelnuts. Yum.
Chocolate and hazelnut cake (recipe adapted slightly from Nigel Slater)
makes one deep cake
250g butter (I used lactose free spread)
100g demerara sugar
100g dark brown sugar
1 tsp vanilla paste
4 eggs
2 tablespoons of coffee, made and set aside to cool slightly
250g plain flour
2 tsp baking powder
pinch salt
200g chopped hazelnuts
250g of dark chocolate, chopped
30g butter
1/2 tablespoon golden syrup
tablespoon of double cream
Preheat the oven to 180C/160C FAN. Grease a 23cm spring-form tin, line the base with baking parchment and flour the sides.
Beat the butter, sugar and vanilla together until light and creamy. Beat in the eggs one at a time, followed by the coffee. Fold in the flour, baking powder and salt until almost combined. Finally fold in the hazelnuts and chocolate, reserving 30g of each, until no streaks of flour are visible and the chunks of nut and chocolate are evenly distributed.
Pour the batter into the prepared tin and level the top, bake for 70-80 minutes until golden and cooked through. Mine took 75 minutes, after 1 hour I covered the top with foil.
Leave the cake to cool in the tin for 10 minutes before transferring to a wire rack to cool completely.
Leave the cake to completely cool.
To make the topping put the butter, golden syrup, cream and reserved chocolate in a pan, heat gently, stirring occasionally until the chocolate has melted and all the ingredients are combined. Remove from the heat and set aside for 15 minutes to thicken up slightly.
Spread over the cooled cake and sprinkle with the reserved hazelnuts.
I should say that I had no electric whisk just a wooden spoon and elbow grease and it turned out lovely.
I would say this is a special enough cake for any occasion, but it matters not if this occasion is simple because it is a Tuesday.
This cake contains chocolate and as 'C' is the letter for this months alpha bakes I am going to enter this cake, I suspect Ros is going to get a lot of entries with chocolate in this month...
Thursday, 12 September 2013
Quince and Camembert flatbreads
The letter for this months alpha bakes is 'Q'. A tricky one perhaps but I knew immediately what I wanted to bake. I have had my eye on these little flatbreads for a while.
They contain quince paste, which I believe you can get all year round so no waiting for quince's to come into season.
These are a Paul Hollywood recipe and can be found here
A few notes.
1) I halved the recipe for the two of us.
2)We had some the day I made the dough, and some the next day and some the next! The dough kept really well wrapped up tight in clingfilm in the fridge.
3)Three I did no read properly and put in all the water at once. I do not think it made a blind but of difference apart from it was crazily messy to begin with.
These taste amazing, honestly they are my favourite flatbreads to date. Considering that Camembert has a pretty strong flavour I wondered if it would overpower the quince. I need not have worried the flavours balance beautifully. The texture of these flatbreads is lovely and soft, maybe because the dough is wet, maybe from melty cheese, either way it is very very good.
They contain quince paste, which I believe you can get all year round so no waiting for quince's to come into season.
These are a Paul Hollywood recipe and can be found here
A few notes.
1) I halved the recipe for the two of us.
2)We had some the day I made the dough, and some the next day and some the next! The dough kept really well wrapped up tight in clingfilm in the fridge.
3)Three I did no read properly and put in all the water at once. I do not think it made a blind but of difference apart from it was crazily messy to begin with.
These taste amazing, honestly they are my favourite flatbreads to date. Considering that Camembert has a pretty strong flavour I wondered if it would overpower the quince. I need not have worried the flavours balance beautifully. The texture of these flatbreads is lovely and soft, maybe because the dough is wet, maybe from melty cheese, either way it is very very good.
Sunday, 21 July 2013
Garlic and coriander flatbreads
I am loving this hot weather and I love cooking but combining the two is not bringing me joy, especially in my small kitchen. I also love a salad but just because it is hot does not mean that sometimes I want a little bit more.
I made these flatbreads to go alongside a greek salad, a fast and delicious super for the summer time.
Garlic and coriander flatbread
makes 4
115g white bread flour
50g wholemeal bead flour
1 tsp baking powder
1/2 tsp salt
1/2 tsp ground coriander
50g of greek yoghurt
200ml boiled water
2 cloves garlic
Tablespoon of olive oil
Crush one of the garlic cloves (either with a garlic press or use a pestle and mortar, add to the oil and set aside to infuse.
Put the flours, baking powder, salt and coriander into a bowl and briefly mix. Crush a garlic clove and add to the greek yoghurt and stir in the water.
Add the wet ingredients to the dry, a little at a time, mixing to form a dough. Knead the dough for a minute or two then leave to rest for a couple of minutes, this will make it easier to roll.
Flour a surface and roll out 1/4 of the dough a thin as possible. Heat a frying pan and add the flatbread to the pan (no oil). Cook for just over a minute on each side until browned and puffy, some flatbreads puff up alarmingly but do not worry.
When cooked brush with the oil and store on a dinner plate covered with a clean tea towel while you cook the others.. This allows the flatbreads to steam and keeps them warm and soft.
The flatbreads are soft and full of favour, I will definitely be making again, and trying different flavour combinations. Enjoy them alongside salads, as part of a mezze or even wrapped around a burger!
I had half of the dough leftover. I wrapped it in clingfilm and stored it in the fridge until the next day when I made two more and wrapped them around homemade bean burgers and spicy relish. They were amazing but sadly no pictures as I was too busy stuffing my face and genuinely forgot!
I am going to enter these into this months alpha bakes as the letter if 'F'.
I made these flatbreads to go alongside a greek salad, a fast and delicious super for the summer time.
Garlic and coriander flatbread
makes 4
115g white bread flour
50g wholemeal bead flour
1 tsp baking powder
1/2 tsp salt
1/2 tsp ground coriander
50g of greek yoghurt
200ml boiled water
2 cloves garlic
Tablespoon of olive oil
Crush one of the garlic cloves (either with a garlic press or use a pestle and mortar, add to the oil and set aside to infuse.
Put the flours, baking powder, salt and coriander into a bowl and briefly mix. Crush a garlic clove and add to the greek yoghurt and stir in the water.
Add the wet ingredients to the dry, a little at a time, mixing to form a dough. Knead the dough for a minute or two then leave to rest for a couple of minutes, this will make it easier to roll.
Flour a surface and roll out 1/4 of the dough a thin as possible. Heat a frying pan and add the flatbread to the pan (no oil). Cook for just over a minute on each side until browned and puffy, some flatbreads puff up alarmingly but do not worry.
When cooked brush with the oil and store on a dinner plate covered with a clean tea towel while you cook the others.. This allows the flatbreads to steam and keeps them warm and soft.
The flatbreads are soft and full of favour, I will definitely be making again, and trying different flavour combinations. Enjoy them alongside salads, as part of a mezze or even wrapped around a burger!
I had half of the dough leftover. I wrapped it in clingfilm and stored it in the fridge until the next day when I made two more and wrapped them around homemade bean burgers and spicy relish. They were amazing but sadly no pictures as I was too busy stuffing my face and genuinely forgot!
I am going to enter these into this months alpha bakes as the letter if 'F'.
Wednesday, 17 July 2013
Florentines
The letter for this months alpha bakes is F. I had a few ideas, none of which were initially florentines. However whilst flicking through John Whaites book I saw his version and realised a) I have never made one and b) I have never eaten one.
So florentines it was. I did change his recipe a little so have my version below.
Florentines
makes ~15
60g butter
50g light brown sugar
15g golden syrup
50g sultanas, chop any big ones
30g dried apricot, roughly chopped
100g salted peanuts, roughly chopped
25g plain flour
50g dark chocolate
Preheat the oven to 180C/160C FAN and line two/three baking sheets with baking parchment.
Mix the dried fruit, nuts and flour in a bowl. Gently melt the butter, sugar and golden syrup, when fully melted tip into the dry ingredients and stir until fully combined.
Drop heaped teaspoons of the mixture onto the prepared baking sheets.
Bake in the oven for 7-8 minutes until golden. Leave to cool on the baking sheets.
Once cool they can be peeled from the baking paper. Melt the chocolate and drizzle over the florentines.
These were pretty simple to make, I have a few different sizes, clearly I did not heap my teaspoon very evenly!
My first ever florentine did taste pretty good. Personally I think I would prefer my fruit, nuts and chocolate in an actual cookie but that is personal preference I guess.
So florentines it was. I did change his recipe a little so have my version below.
Florentines
makes ~15
60g butter
50g light brown sugar
15g golden syrup
50g sultanas, chop any big ones
30g dried apricot, roughly chopped
100g salted peanuts, roughly chopped
25g plain flour
50g dark chocolate
Preheat the oven to 180C/160C FAN and line two/three baking sheets with baking parchment.
Mix the dried fruit, nuts and flour in a bowl. Gently melt the butter, sugar and golden syrup, when fully melted tip into the dry ingredients and stir until fully combined.
Drop heaped teaspoons of the mixture onto the prepared baking sheets.
Bake in the oven for 7-8 minutes until golden. Leave to cool on the baking sheets.
Once cool they can be peeled from the baking paper. Melt the chocolate and drizzle over the florentines.
My first ever florentine did taste pretty good. Personally I think I would prefer my fruit, nuts and chocolate in an actual cookie but that is personal preference I guess.
Tuesday, 25 June 2013
Robiols
So what are robiols? They are a Mallorcan dessert, traditionally eaten at Christmas and Easter. How do I know about them? A friend at work, originally from mallorca, baked some and bought them in. They are a filled biscuit that looks a lot like cornish pasty. I immediately asked for the recipe.
I did get a recipe, except it was limited to a list of ingredients. So feeling a little like one of the bake off contestants in their technical challenge. I set about making the biscuits based on a picture and my baking knowledge.
The result is amazing. The biscuit itself is crumbly and short, which surprised me a little considering the dough gets worked much more than a conventional shortbread. Maybe its the oil in it.
For the filling I used nutella. Though in Mallorca the filling varies, fruit paste, sweet cheese etc.
Robiols
makes 24-26
75g butter
75g caster sugar
egg yolk
25ml olive oil
25ml milk
juice of 1/2 orange
250g plain flour
nutella
Cream the butter ad sugar together. Add the egg yolk ,olive oil, milk and orange juice, mix until combined. Add the flour and bring together the ingredients to form a dough. Wrap the dough in clingfilm and chill for 30 minutes.
Preheat the oven to 175C/155C FAN and grease a baking sheet with butter. Flour a work surface and roll out the dough, depending on the size of your work surface you may have to do this in two batches.
Once the dough is very thin cut out circles, using a cookie cutter, I used one 3 inches in diameter. The trimmings can be rerolled and cut out too.
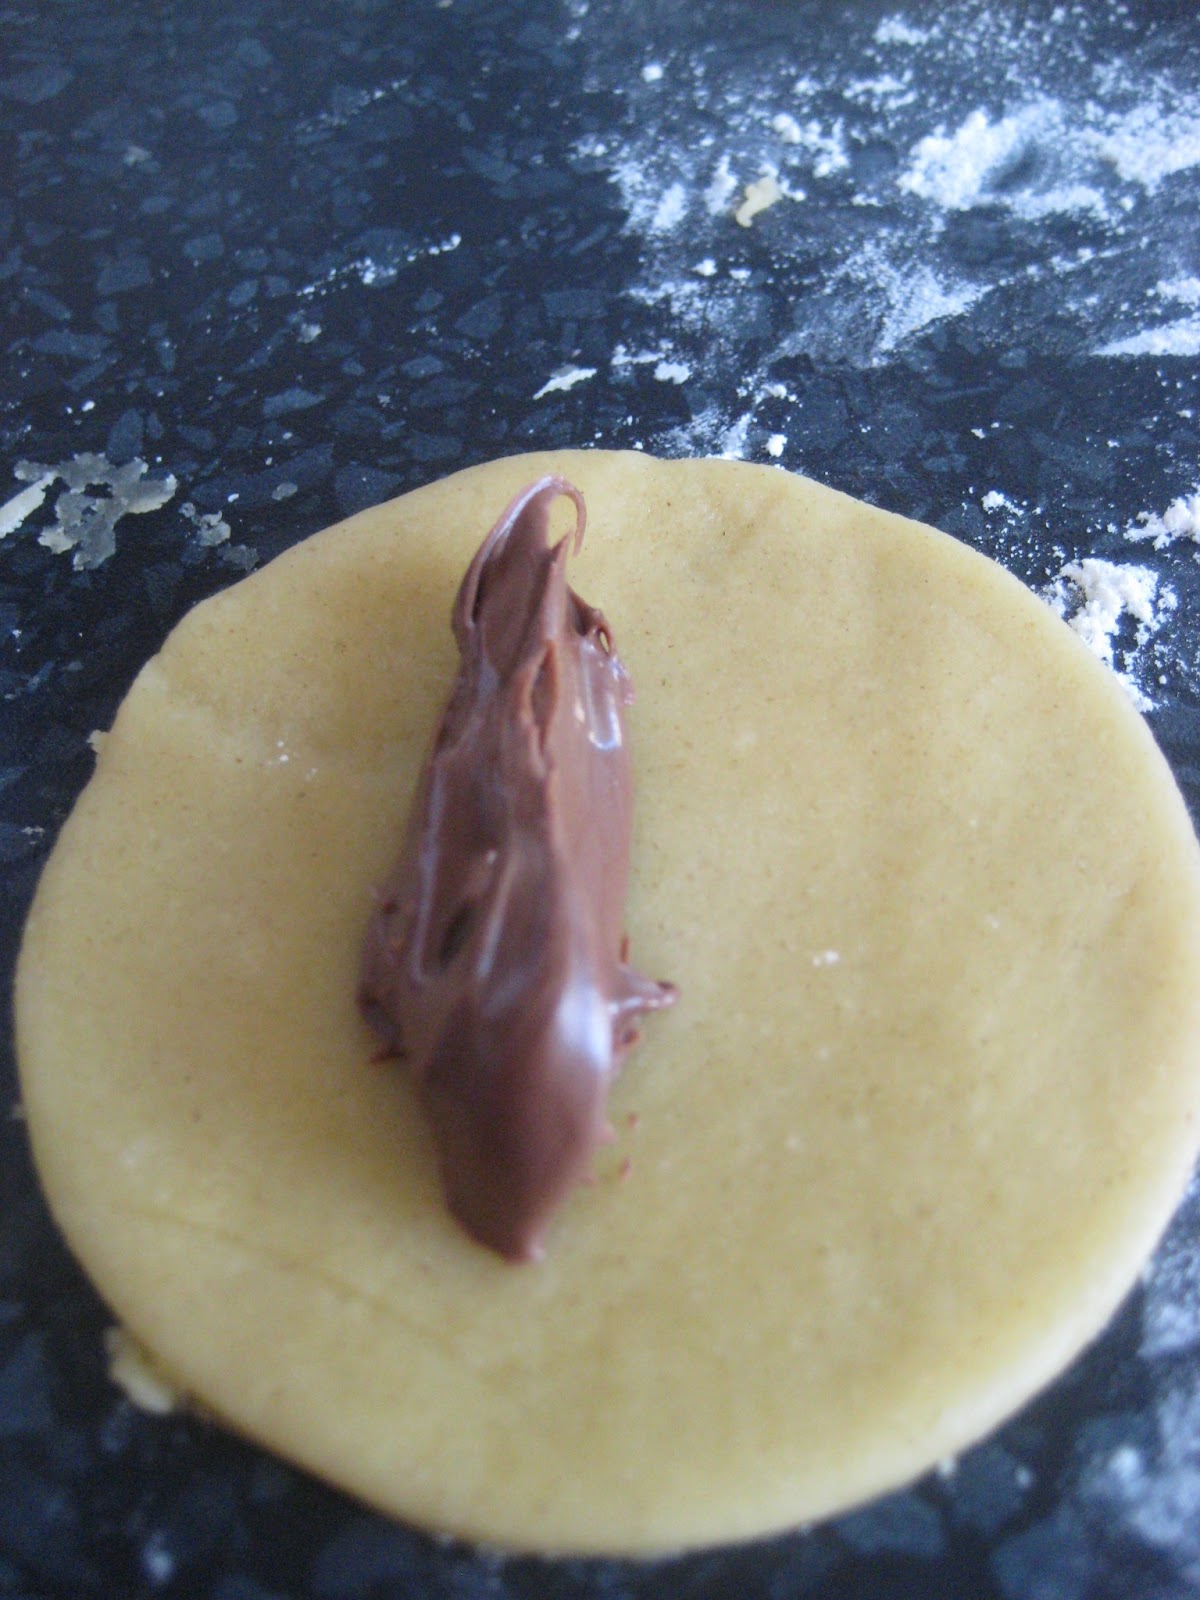
Place a teaspoon of nutella on one half the circle.
Fold in half and crimp the edges with a fork.
Bake for 10-15 minutes until golden. Transfer to a wire rack to cool.
These delicious beauties begin with R so I am going to send them to this months alpha bakes. This month hosted by Ros at the more than occasional baker.
I did get a recipe, except it was limited to a list of ingredients. So feeling a little like one of the bake off contestants in their technical challenge. I set about making the biscuits based on a picture and my baking knowledge.
The result is amazing. The biscuit itself is crumbly and short, which surprised me a little considering the dough gets worked much more than a conventional shortbread. Maybe its the oil in it.
For the filling I used nutella. Though in Mallorca the filling varies, fruit paste, sweet cheese etc.
Robiols
makes 24-26
75g butter
75g caster sugar
egg yolk
25ml olive oil
25ml milk
juice of 1/2 orange
250g plain flour
nutella
Cream the butter ad sugar together. Add the egg yolk ,olive oil, milk and orange juice, mix until combined. Add the flour and bring together the ingredients to form a dough. Wrap the dough in clingfilm and chill for 30 minutes.
Preheat the oven to 175C/155C FAN and grease a baking sheet with butter. Flour a work surface and roll out the dough, depending on the size of your work surface you may have to do this in two batches.
Once the dough is very thin cut out circles, using a cookie cutter, I used one 3 inches in diameter. The trimmings can be rerolled and cut out too.
Place a teaspoon of nutella on one half the circle.
Fold in half and crimp the edges with a fork.
Bake for 10-15 minutes until golden. Transfer to a wire rack to cool.
These delicious beauties begin with R so I am going to send them to this months alpha bakes. This month hosted by Ros at the more than occasional baker.
Sunday, 23 June 2013
Raspberry ricotta buckle
Does anyone else watch Anna Olsen? I will admit, at first I was not convinced by the show. However her bakes looked delicious and after a while I realised it was nice to have a cooking show with good instructions and all about the food itself. Not me me me.
I needed a cake I could knock up pretty quickly, that did not need frosting etc and I remembered she has had a few recipes on coffee cakes. I quickly found a recipe for her raspberry ricotta buckle. It sounded highly intriguing. The ricotta replaces the majority of the butter in the cake.
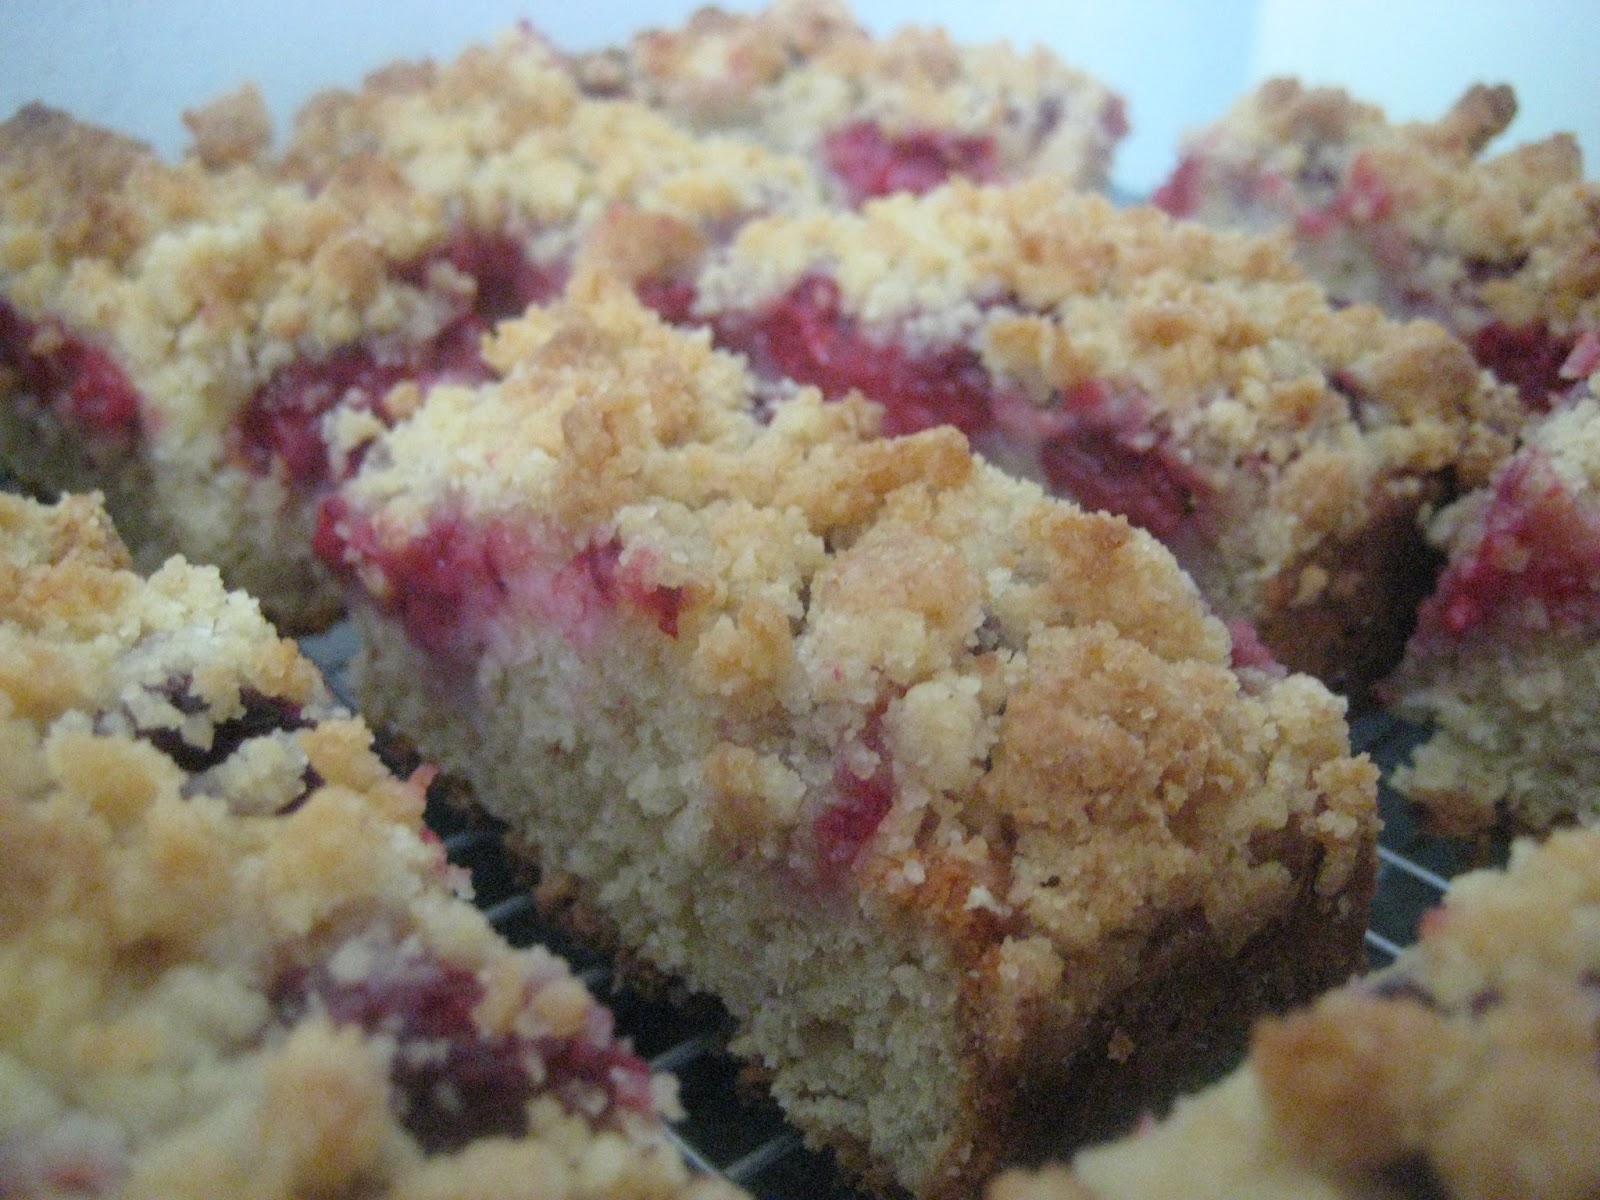
It is a sponge cake, topped with raspberries and topped again with a streusel topping.
The exact recipe I used can be found here.
The first day the streusel topping has a fantastic crunch, but I think the cake flavour is more pronounced the second day.
It may have been my first Anna Olsen bake but it will not be my last, her instructions a clear and concise and the result is brilliant. I have my eye on a few recipe, now which shall I bake first?
As both raspberry and ricotta both begin with 'R' I am going to enter this cake into this months alpha bakes.
I needed a cake I could knock up pretty quickly, that did not need frosting etc and I remembered she has had a few recipes on coffee cakes. I quickly found a recipe for her raspberry ricotta buckle. It sounded highly intriguing. The ricotta replaces the majority of the butter in the cake.
It is a sponge cake, topped with raspberries and topped again with a streusel topping.
The exact recipe I used can be found here.
The first day the streusel topping has a fantastic crunch, but I think the cake flavour is more pronounced the second day.
It may have been my first Anna Olsen bake but it will not be my last, her instructions a clear and concise and the result is brilliant. I have my eye on a few recipe, now which shall I bake first?
As both raspberry and ricotta both begin with 'R' I am going to enter this cake into this months alpha bakes.
Tuesday, 21 May 2013
Kremesh
This is a photo of me looking exceedingly happy.
Why am I so happy. Well I am eating baking. And not just any baking. When I watched the Hairy Bikers bakation series I fell in love with a dish called Kremesh that they ate at a cafe in Budapest. Kremesh is essentially a cross between a vanilla slice and mille feuille. It is made of layers of puffed pastry and a vanilla custard.
While inter-railing I just happened to be in Budapest, a fantastic place, you should all go, and I tracked down this cafe and had the Kremesh. It was worth the journey, it was fantastic.
I knew I wanted to make it but saved actually making it until the letter 'K' came up for alpha bakes, and finally this month it appeared.
My Kremesh tasted amazing but did not look good. The recipe said stir the custard till thick, mine was pretty thick, more thick than I would like on crumble. But it needed to me thicker, it literally needs cooking out until you could stand a spoon in it! Also my pastry puffed up too much, If I made my own I do not think it would do that, I would also consider baking it between two tray, as like mille feuille.
Still I have learnt and its definitely one I would make again.
Kremesh
makes about 8
pack of puff pastry (350g ish)
500ml milk
Vanilla pod
150g caster sugar
75g egg yolk (about 5)
65g plain flour
75g egg white (2-3)
65g icing sugar
Each Kremesh has 3 layers. I prefer to precut the layers instead of baking th pastry and then cutting it. Cut you pastry rectangles, each kremesh needs 3 and they all need to be the same size.
Follow the pack instructions and cook your pastry until it is golden and puffed up. Set aside to cool.
To make the custard filling first gently heat the milk with the seeds from the vanilla pod until just boiling, remove from the heat and set aside to cool.
Whisk the egg yolks with the caster sugar until combined. Whisk in the flour, a little at a time, until you have a smooth paste. Add the milk, a little at a time, whisking constantly. Make sure the milk has cooled enough otherwise the eggs may scramble.
Once all the milk ha been incorporated into the egg mix tip the whiole mixture back into the pan. Heat gently, stiring constantly until the custard has thickened. By thickened I have learnt that this means, really very very thick not just simply thickened. Remoe from the heat and set aside.
Whisk the egg whites with the icing sugar until stiff peaks form. Fold into the custard. the custard will still be warm, that's ok.
Assemble the Kremesh by layering pastry and custard.
What my Kremesh lacked presentation made up for in yumminess!
Why am I so happy. Well I am eating baking. And not just any baking. When I watched the Hairy Bikers bakation series I fell in love with a dish called Kremesh that they ate at a cafe in Budapest. Kremesh is essentially a cross between a vanilla slice and mille feuille. It is made of layers of puffed pastry and a vanilla custard.
While inter-railing I just happened to be in Budapest, a fantastic place, you should all go, and I tracked down this cafe and had the Kremesh. It was worth the journey, it was fantastic.
I knew I wanted to make it but saved actually making it until the letter 'K' came up for alpha bakes, and finally this month it appeared.
My Kremesh tasted amazing but did not look good. The recipe said stir the custard till thick, mine was pretty thick, more thick than I would like on crumble. But it needed to me thicker, it literally needs cooking out until you could stand a spoon in it! Also my pastry puffed up too much, If I made my own I do not think it would do that, I would also consider baking it between two tray, as like mille feuille.
Still I have learnt and its definitely one I would make again.
Kremesh
makes about 8
pack of puff pastry (350g ish)
500ml milk
Vanilla pod
150g caster sugar
75g egg yolk (about 5)
65g plain flour
75g egg white (2-3)
65g icing sugar
Each Kremesh has 3 layers. I prefer to precut the layers instead of baking th pastry and then cutting it. Cut you pastry rectangles, each kremesh needs 3 and they all need to be the same size.
Follow the pack instructions and cook your pastry until it is golden and puffed up. Set aside to cool.
To make the custard filling first gently heat the milk with the seeds from the vanilla pod until just boiling, remove from the heat and set aside to cool.
Whisk the egg yolks with the caster sugar until combined. Whisk in the flour, a little at a time, until you have a smooth paste. Add the milk, a little at a time, whisking constantly. Make sure the milk has cooled enough otherwise the eggs may scramble.
Once all the milk ha been incorporated into the egg mix tip the whiole mixture back into the pan. Heat gently, stiring constantly until the custard has thickened. By thickened I have learnt that this means, really very very thick not just simply thickened. Remoe from the heat and set aside.
Whisk the egg whites with the icing sugar until stiff peaks form. Fold into the custard. the custard will still be warm, that's ok.
Assemble the Kremesh by layering pastry and custard.
What my Kremesh lacked presentation made up for in yumminess!
Subscribe to:
Posts (Atom)