Showing posts with label hazelnut. Show all posts

Thursday, 2 October 2014

Gluten free nutella bread

Thus is me catching up with my bake off posts. This is from last week where the contestants had to make an enriched loaf. I tweaked this challenge slightly as their loafs involved fruit and I did not want fruit, I wanted chocolate.


The recipe for the braided nutella bread comes from the delightful Gluten-Free on a Shoestring blog and the recipe can be found here.

I did have to make my own nutella as shop bought contains dairy and I will share this recipe below.

The finished load does look beautiful and is the nicest gluten free bread that I have made so far. It was perfect warm from the oven with a little extra nutella and a pot of tea for a special weekend breakfast.


Homemade nutella (Dairy and Gluten free)

100g hazelnuts (skinned)
2 tbsp good cocoa powder (I used green and blacks)
4-5 tbsp of hazelnut milk (Or use almond or soy milk if you cannot get hold of hazelnut)
1 1/2 tbs brown sugar or maple syrup
1/2 tsp vanilla paste

Blitz the hazelnuts in a food processor until they from a smooth-ish paste. Add all the other ingredients and continue to blitz until combined and as smooth as possible. Transfer to a sterile jar and keep in the fridge, eat within a couple of weeks. 

This nutella is a more grown up version, it is a little more intense, darker and not as sweet. I really like this however should you wish to make it sweeter simply add more sugar/maple syrup until it as sweet as you desire. This nutella is quite thick, add a splash more milk if you desire.

As well as the bread this nutella is great on toast topped with a sliced banana! 

Thursday, 24 October 2013

Chocolate and hazelnut cake

I miss baking! In my last post I mentioned that I had been away with work. When I got back the oven was (temporalily) broken and then I went away on holiday. Holiday was very nice but I do miss the act/smell taste of some baked goods. I am away this weekend too (brownie camp) so I doubt October will be very fruititous in the baking department.

Still I did find time when I was away to make this, quite frankly, delicious cake. It was devoured fast enough by my fiances family and myself.

This cake is a cross between a maryland cookie, ferrero rocher and a cake. If that has not convinced you to give it a try nothing ever will.

A vanilla and hint of coffee sponge, packed with hazelnuts and dark chocolate, topped with a chocolate glaze and more hazelnuts. Yum.


Chocolate and hazelnut cake (recipe adapted slightly from Nigel Slater)

makes one deep cake

250g butter (I used lactose free spread)
100g demerara sugar
100g dark brown sugar
1 tsp vanilla paste
4 eggs
2 tablespoons of coffee, made and set aside to cool slightly
250g plain flour
2 tsp baking powder
pinch salt
200g chopped hazelnuts
250g of dark chocolate, chopped

30g butter
1/2 tablespoon golden syrup
tablespoon of double cream

Preheat the oven to 180C/160C FAN. Grease a 23cm spring-form tin, line the base with baking parchment and flour the sides.

Beat the butter, sugar and vanilla together until light and creamy. Beat in the eggs one at a time, followed by the coffee. Fold in the flour, baking powder and salt until almost combined. Finally fold in the hazelnuts and chocolate, reserving 30g of each, until no streaks of flour are visible and the chunks of nut and chocolate are evenly distributed. 

Pour the batter into the prepared tin and level the top, bake for 70-80 minutes until golden and cooked through. Mine took 75 minutes, after 1 hour I covered the top with foil. 

Leave the cake to cool in the tin for 10 minutes before transferring to a wire rack to cool completely.

Leave the cake to completely cool. 

To make the topping put the butter, golden syrup, cream and reserved chocolate in a pan, heat gently, stirring occasionally  until the chocolate has melted and all the ingredients are combined. Remove from the heat and set aside for 15 minutes to thicken up slightly.

Spread over the cooled cake and sprinkle with the reserved hazelnuts. 

I should say that I had no electric whisk just a wooden spoon and elbow grease and it turned out lovely.
I would say this is a special enough cake for any occasion, but it matters not if this occasion is simple because it is a Tuesday.


This cake contains chocolate and as 'C' is the letter for this months alpha bakes I am going to enter this cake, I suspect Ros is going to get a lot of entries with chocolate in this month...

Tuesday, 25 June 2013

Robiols

So what are robiols? They are a Mallorcan dessert, traditionally eaten at Christmas and Easter. How do I know about them?  A friend at work, originally from mallorca, baked some and bought them in. They are a filled biscuit that looks a lot like cornish pasty. I immediately asked for the recipe.

I did get a recipe, except it was limited to a list of ingredients. So feeling a little like one of the bake off contestants in their technical challenge. I set about making the biscuits based on a picture and my baking knowledge.


The result is amazing. The biscuit itself is crumbly and short, which surprised me a little considering the dough gets worked much more than a conventional shortbread. Maybe its the oil in it.

For the filling I used nutella. Though in Mallorca the filling varies, fruit paste, sweet cheese etc.


Robiols

makes 24-26

75g butter
75g caster sugar
egg yolk
25ml olive oil
25ml milk
juice of 1/2 orange
250g plain flour
nutella

Cream the butter ad sugar together. Add the egg yolk ,olive oil, milk and orange juice, mix until combined. Add the flour and bring together the ingredients to form a dough. Wrap the dough in clingfilm and chill for 30 minutes.

Preheat the oven to 175C/155C FAN and grease a baking sheet with butter. Flour a work surface and roll out the dough, depending on the size of your work surface you may have to do this in two batches. 

Once the dough is very thin cut out circles, using a cookie cutter, I used one 3 inches in diameter. The trimmings can be rerolled and cut out too.

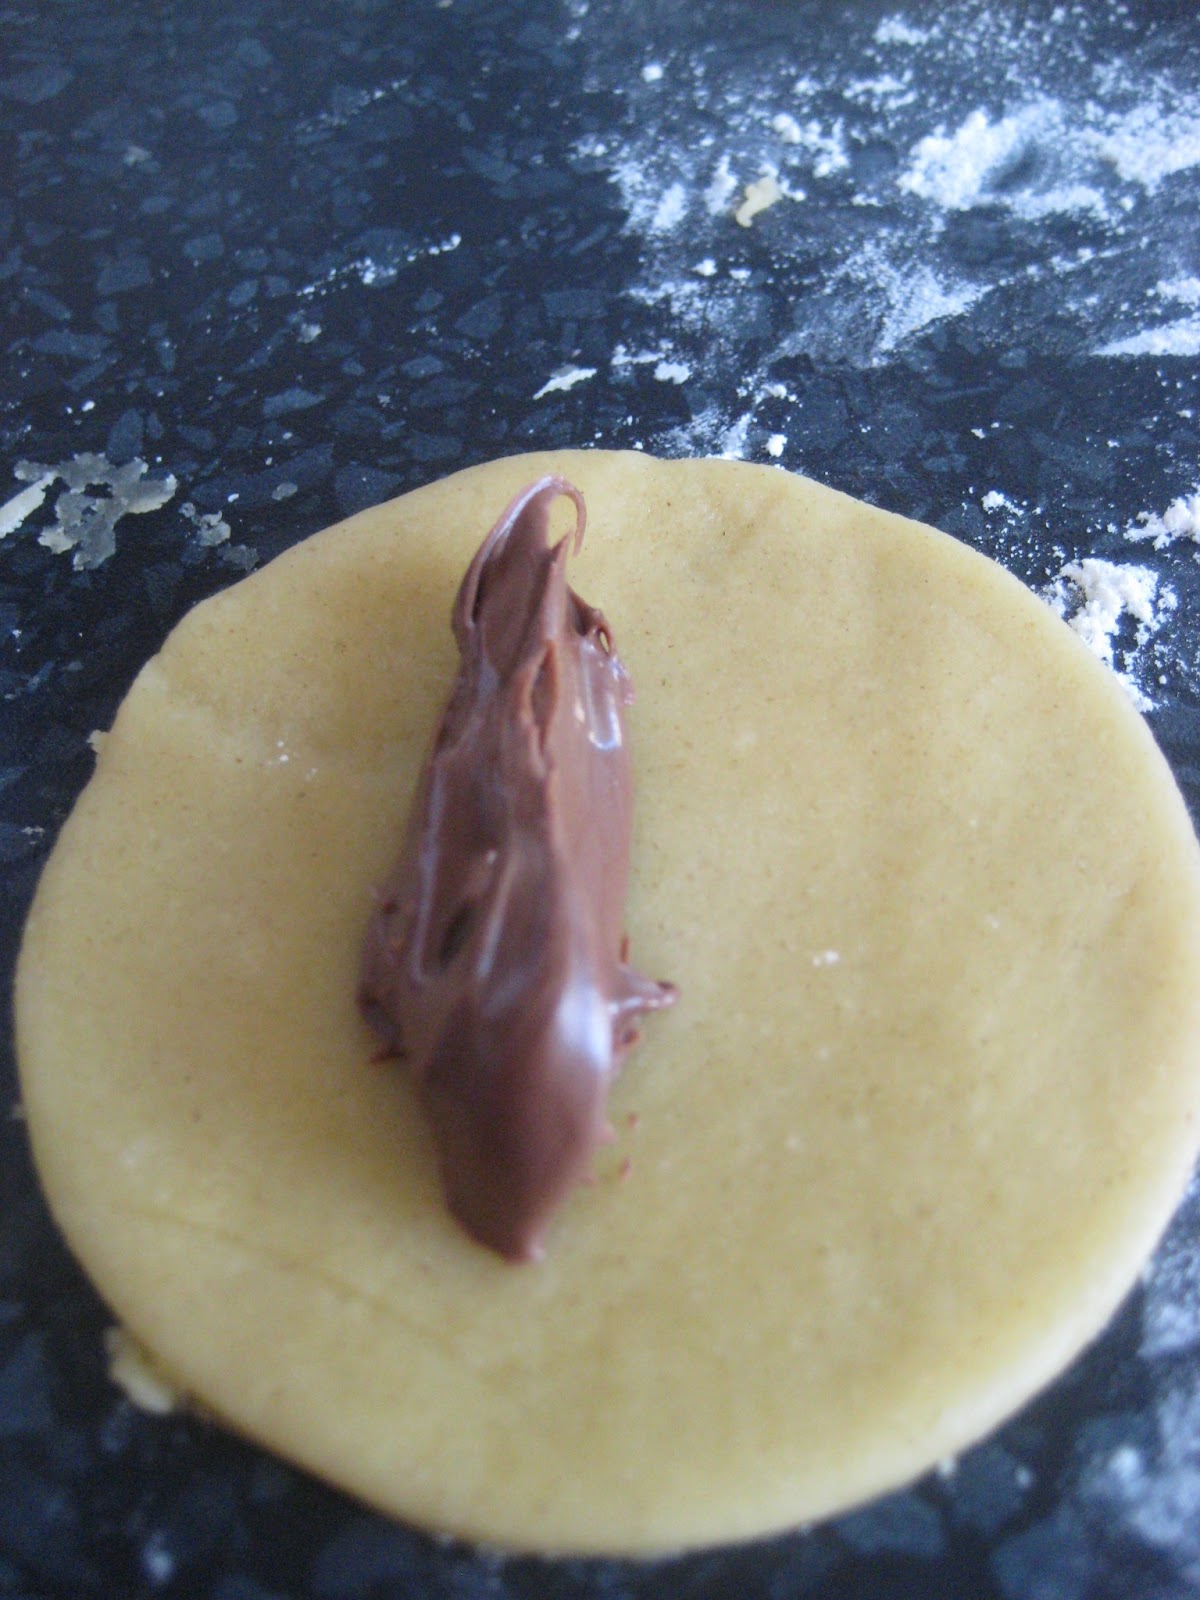
Place a teaspoon of nutella on one half the circle.

Fold in half and crimp the edges with a fork.
Bake for 10-15 minutes until golden. Transfer to a wire rack to cool. 

These delicious beauties begin with R so I am going to send them to this months alpha bakes. This month hosted by Ros at the more than occasional baker.


Tuesday, 5 March 2013

Apple breakfast bars

I mentioned a few posts back that I had made Nigella's breakfast bars with minor tweaks.

I loved these bars and thought they had real potential to be really modified to create some lovely new bars for breakfast and snacks.

These have a very English autumnal feeling with apples, raisins and hazelnuts. I also spiked the condensed milk with a little honey that pairs beautifully with the other flavours.


Apple breakfast bars

1 tin condensed milk (395g), light is absolutey fine
1 tablespoon honey
250g oats
75g dessicated coconut
60g mixed seeds
100g whole blanched hazelnuts, roughly chopped
80g dried apple, chopped
50g raisins

Preheat the oven to 120C/100C FAN and grease and line a brownie pan (or similar) with baking paper. 

Gently, so that it does not catch, warm the condensed milk and honey in a pan. It does not need to be boiling  just warmed through to loosen it a little. 

Meanwhile mix all the other ingredients in a large bowl. Tip the warm condensed milk and honey into the bowl and make sure everything is well combined.

Tip the whole lot into your prepared tin and level. 

Bake in the preheated oven for 50-55 minutes. Keep an eye on it at the end of cooking time the honey in it means it can get a little too brown in a matter of minutes.

Leave to cool for 15 minutes then, using the baking paper to help you, remove from the pan and cut into bars. Do't leave it too long or they will be much harder to cut! Leave the cut bars on a wire rack to cool.

These bars take no time at all to whip up. keep for a week in a tin, and are the perfect on the go breakfast or snack, what's not to love?

Thursday, 24 May 2012

Hazelnut brownies

In my previous post I mentioned entering alpha bakes, this month the letter is H and I made hazelnut macarons. However this meant I had nutella and hazelnuts left over. Not really a bad thing I suppose, but it is when I can eat nutella from the jar. Weirdly I used to hate it but I am making up for that now! So to stop raiding the jar with a teaspoon I decide to use up the nutella in a baking venture.


By chance I had also found a bar of dark chocolate left over from something ages ago. I decided that I should use up all my leftovers, after all, waste not want not, and made Hazelnut brownies.

Hazelnut brownies


200g dark chocolate
175g butter
200g caster sugar
100g brown sugar
115g plain flour
15g cocoa powder
3 large eggs
Chopped hazelnuts
Nutella

Preheat the oven to 170oC/fan 150oC and line a brownie pan with baking parchment.

Melt the chocolate and butter until smooth (I did this in a bowl over a pan of barely simmering water).


Once melted, remove the butter chocolate mix from the heat and stir in the sugar until fully incorporated.

Add the flour and cocoa powder to the bowl and mix until combined.

Beat the eggs lightly with a fork and add to the bowl, mix until smooth and then finally stir through the chopped hazelnuts. I was using leftovers so did not weigh them, add as many as you like for texture. Reserve some to sprinkle on top. 

Pour half the mixture into the prepared pan and add dollops of nutella, swirl these a bit with a knife. Add the remaining brownie batter on top. Blob on more nutella and swirl.


 Finish with a scattering of chopped hazelnuts and cook for 30-35 minutes until lightly flaky on top but not overcooked.


Leave to cool in the pan and then chop into chunks.


Quick confession, I only had 175g of dark chocolate and figured they would be fine. Which they are, no major disasters. Having said that the texture is different to that of my Oreo brownies. They are not quite as fudgy, a little lighter more cakey. They are not a cake, they are a brownie but the difference is definitely there. I like a fudgy brownie so that will teach me not to be lazy and go get more chocolate from the corner shop!


Saying that these are delicious, dark chocolate and hazelnut makes for the quite the sophisticated brownie. If I were to make these again, not using up leftovers, I would probably put in some chunkier chopped hazelnuts for more of a texture contrast.

Friday, 18 May 2012

Hazelnut macarons


So I decided to be brave and try and figure out how on earth to make macarons in the oven in my new flat. A daunting experience as I had only just worked my old oven out! As it turns out the ovens are total opposites, the first was a bit cold and the one now is a bit hot.

Having decided to make macarons my next issue was what flavour to make. I was reading Ros's, from the more than occasional baker, blog and happened upon alpha bakes. This is a monthly blog event hosted, in turn, by Ros and Caroline, of Carolinemakes, wherein a letter is chosen at random and people submit entries with ingredients or bakes themed around that letter.  


This months alpha bake is hosted by Caroline and the letter for this month is H and so I decided to make my macarons flavoured with one of my favourite nuts, the hazelnut and enter alpha bakes for the first time.

Hazelnut Macarons 

2 large egg whites (80g of egg whites)
pinch cream of tarter
30g caster sugar
1/2 teaspoon vanilla paste

33g ground almonds
33g ground hazelnuts
132g icing sugar

chopped hazelnuts
nutella 


First of all I prepared my baking sheets, I lined them with baking parchment and then used a round pastry cutter to draw little templates. This makes a huge difference look at my neat same sized macarons!


I could not find ground hazelnuts so I simply pounded my chopped hazelnuts in a pestle and mortar. They grind up in no time at all. 


Mix the icing sugar and ground nuts together and set aside.


In a spotlessly clean bowl whisk the egg whites with the cream of tarter until stiff peaks are just beginning to form. At this point keep whisking and add in the caster sugar, a teaspoon at a time, until the mix is stiff and glossy. Add in the vanilla paste and whisk until incorporated. 


Add the icing sugar and nut  mix to the bowl of egg whites and fold in with a spatula. You need to mix enough so that the macaron batter can flow from the spatula 'like lava' BUT be careful not to over mix or your macarons will spread too much when they are piped.


Put the macaron batter into a piping bag fitted with a round tip. I stand my piping bag in a glass for easy filling. I would have taken a photo but piping batter is sticky and has a life of its own, to take a photo I would need at least 3 hands!


Pipe macarons ~5cm in diameter on your prepared baking sheets, making sure to leave room between them.  Give the baking sheets a sharp tap on the work surface to eliminate air bubbles. The macarons must be left, preferably in a warm place, until they have formed a skin. That is, when you lightly touch them, they should not be tacky. Allowing your macarons to form a skin is very important as when your macarons bake it will allow them to have the elusive feet! A skin can take anything from 15 minutes to an hour to form. Be patient!

Look feet!
In a recipe I have I am told to bake my macarons at 170C/150 FAN for ten minutes. This does not work for me. At 150 in my fan oven the tops of my macarons are a little too brown after 10 minutes and the inside is not fully cooked so they fall apart. I have found that I need my oven at 140 and I need to cook my macarons for 13-14 minutes. I am afraid its trial and error. Basically if they are burnt your oven is too hot and of they fall apart when you try and assemble them they needed longer in the oven.   


Leave them to cool completely on the baking sheet. Removing them too early could result in them falling apart.


When they are totally cool sandwich together with nutella. 


Keep your macarons in the fridge, though it is nice to let them get up to room temp for a few minutes before eating them. Macarons will last a few days in the fridge and actually get more lovely a day after making.


So these are my first ever entry for alpha bakes. If you wish to join in check out either Ros or Caroline's site for the instructions and get creative!